
About a year ago, while onsite doing a demo with a potential customer someone stated “I just want an easy button to deploy VMs”. That really stuck with me; To the point, I started shopping on Amazon with a project in my head.

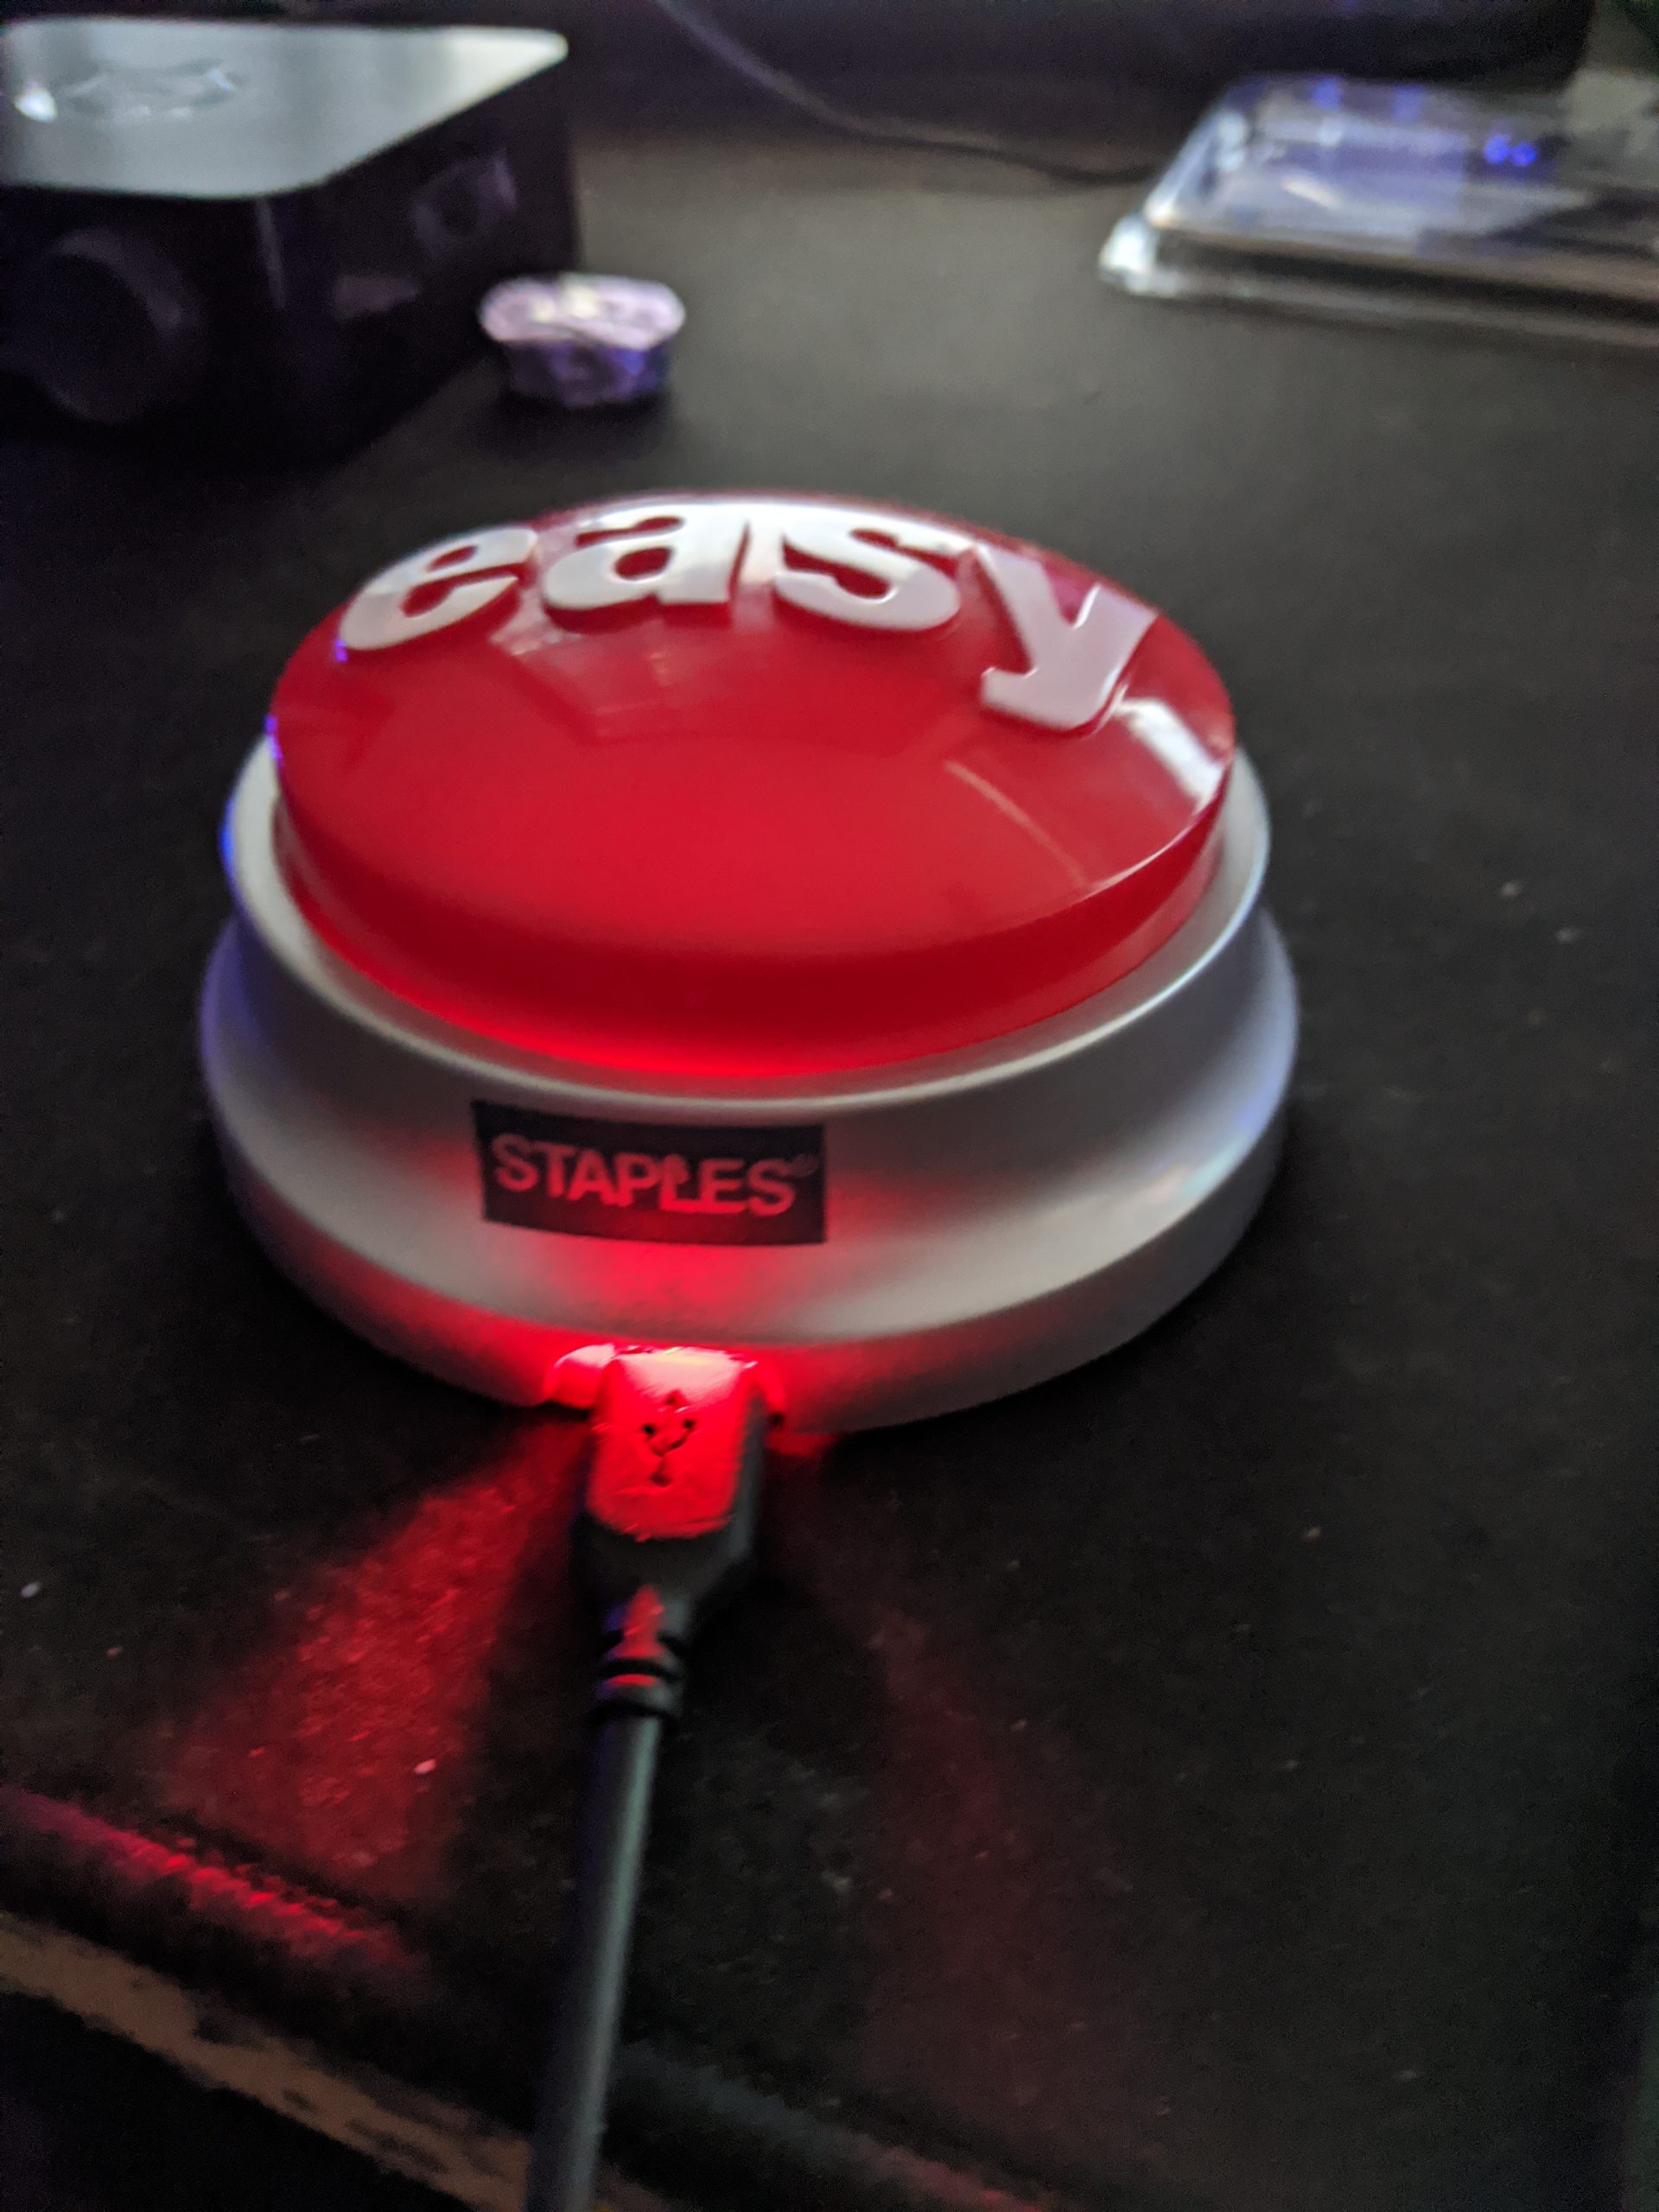
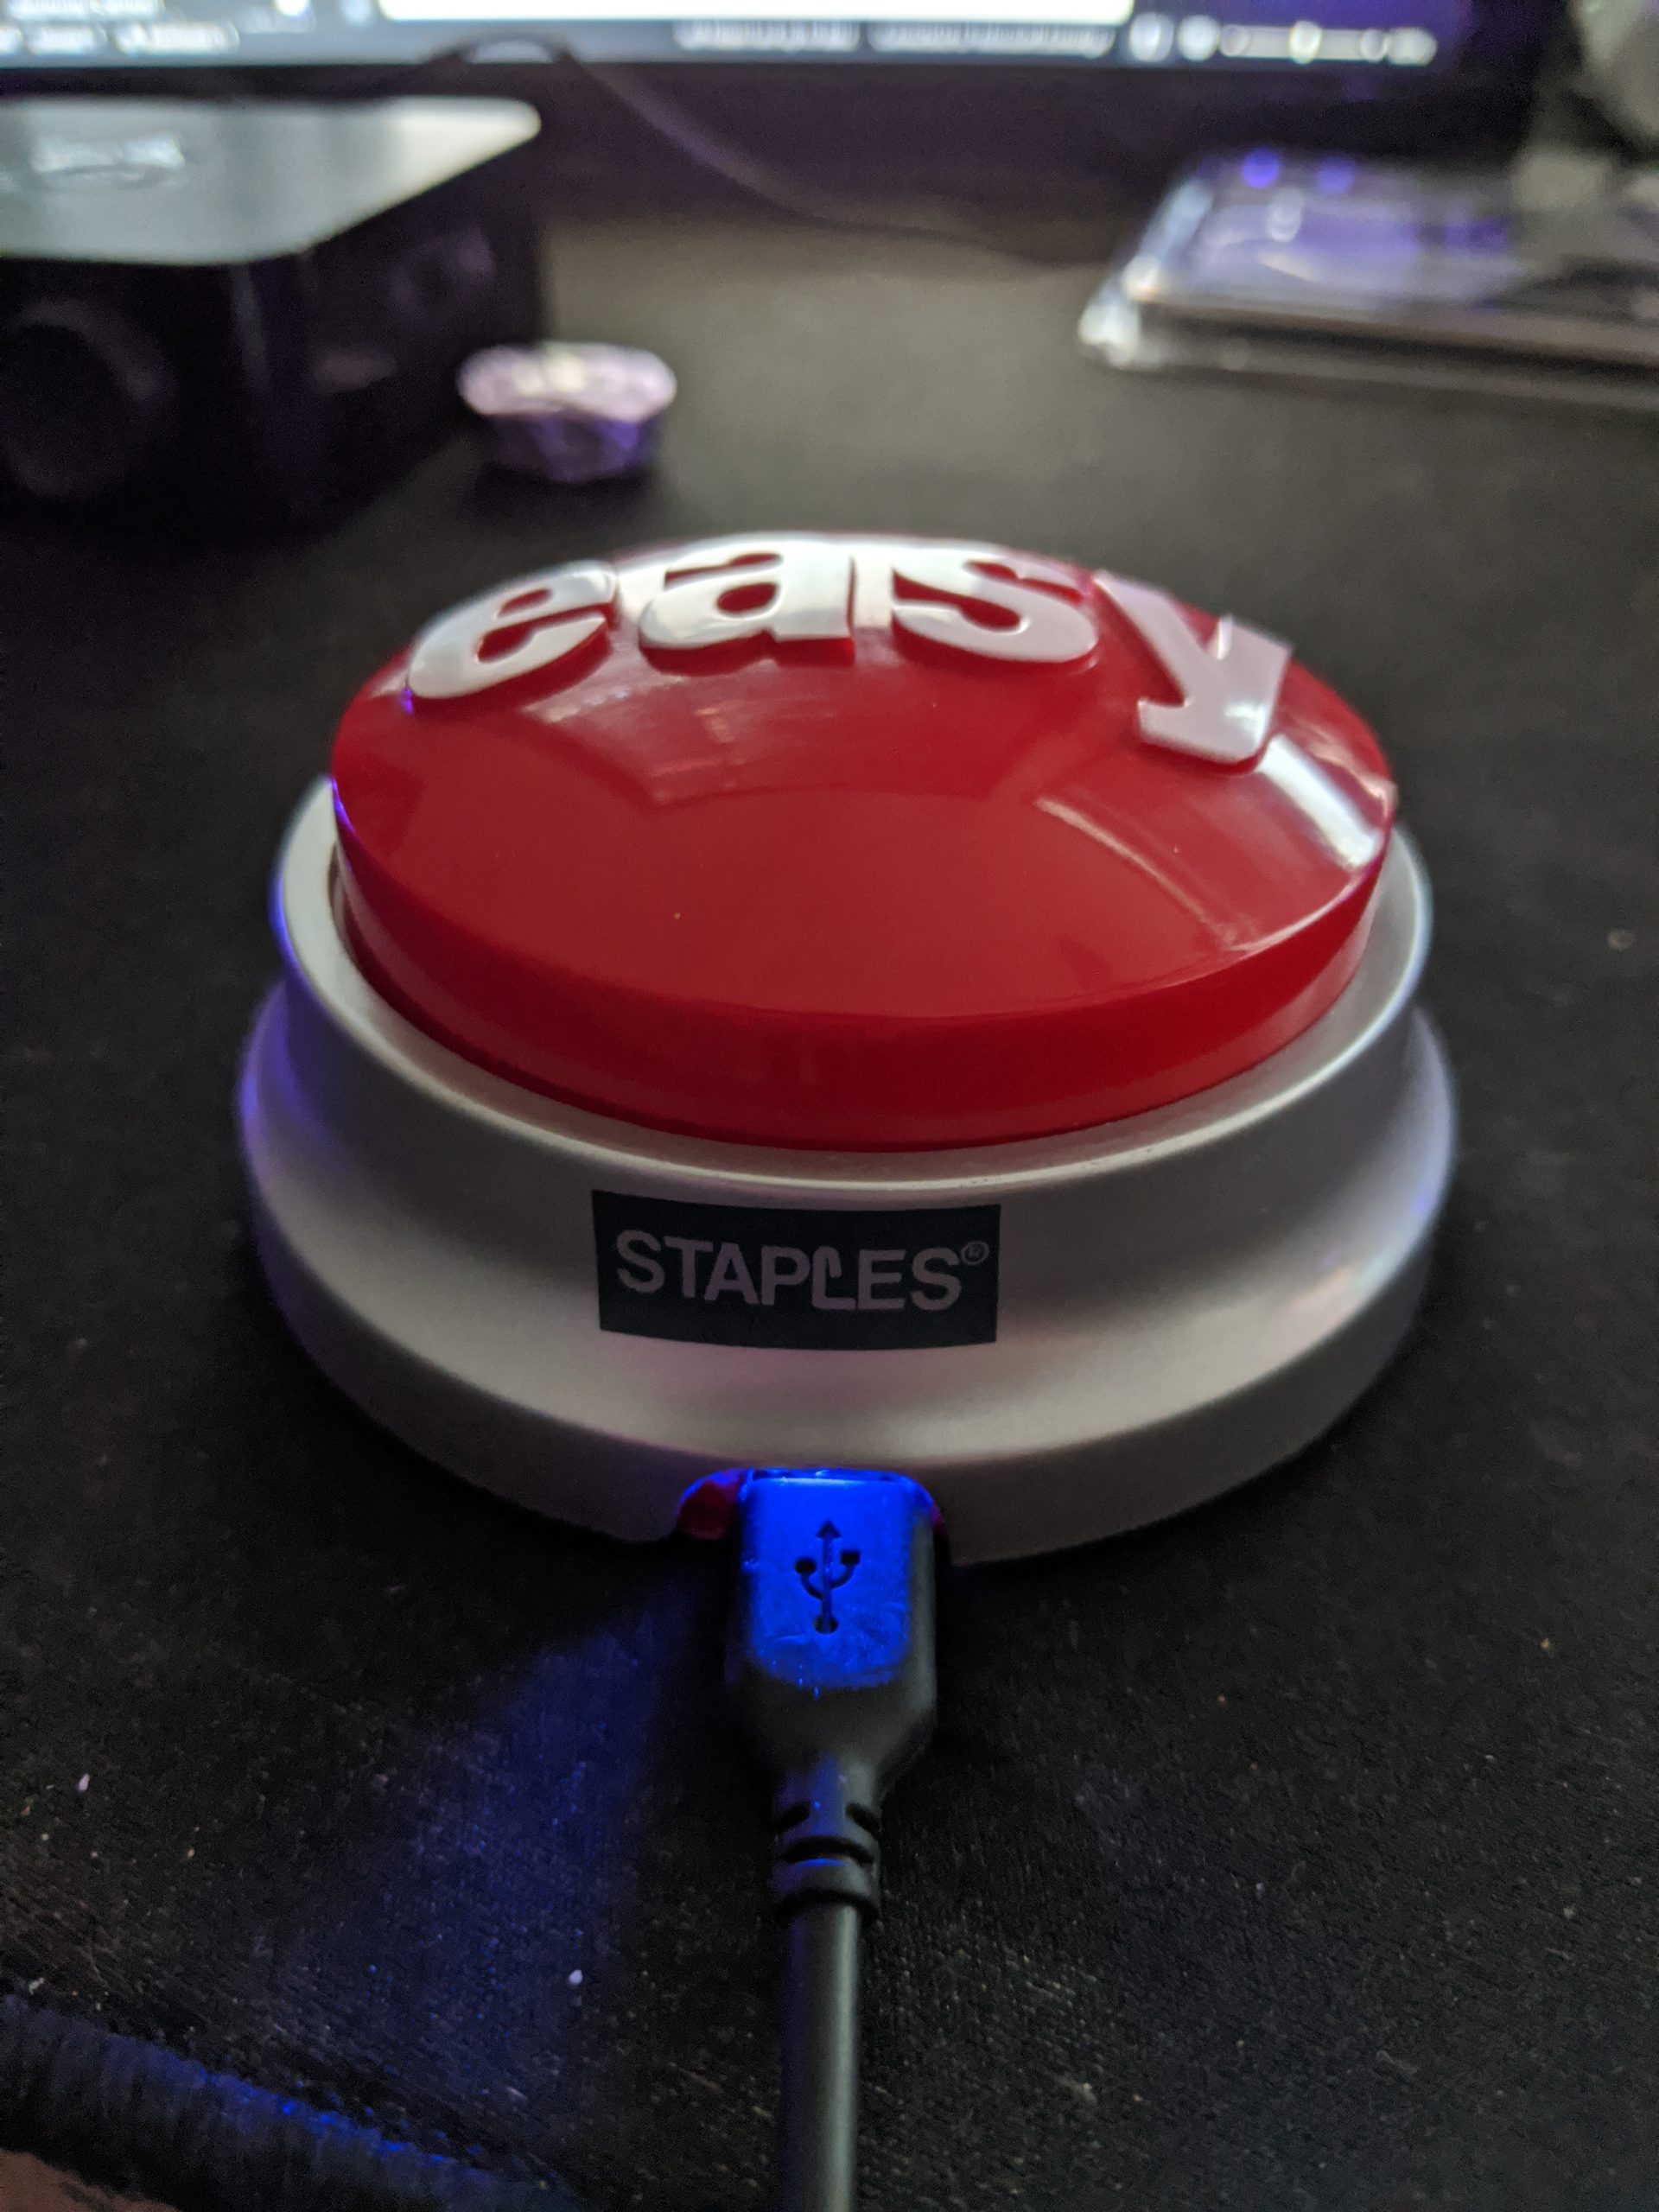
We’re all familiar with those Staples commercials with the ‘Easy Button’. The premise being, something so easy it just takes the push of a button. So of course, I’m doing these demos talking about how easy things are, how available our API is… well hell, I can show how easy it is with a simple push of a button.
Incoming pet project…
Project Scope
The scope of the project is fairly simplistic. I wanted to purchase an ‘Easy Button’ from Amazon and modify it in such a way I could make REST API call(s) to any defined Morpheus CMP appliance. I wanted to ensure that a few easily configurable variables could toggle setups/credentials. Additionally the button needed to be portable so it could travel to client sites and booth duties.
Prior to this project I had 0 experience doing anything with an Arduino/Raspberry Pi and figured this was a good time to broaden my horizons. The fact that there are modules that can connect via bluetooth or WiFi was a huge plus. The consumer base was also large enough, I was hoping there were chunks of code I could easily reuse.
Materials were anything I found on Amazon to keep my life simple.
Materials
- x1 – Staples Easy Button (I started with this because it was the most familiar with folks. There are several generic options out there).
- (Optional) – Arduino Uno + Study Materials (Learning Equipment)
- x1 – ESP8266 NodeMCU CP2102 ESP-12E WiFi Internet (The board I used)
- x3 – 220 ohm Resistors
- x1 – RGB LED
- x1 – 10k ohm Resistor
- x1 – Button
- x7 – Wires for Connectivity
- Hot Glue Gun
- Soldering Iron/Solder
Breaking Down the Code
Note: The challenge of writing for the ESP 8266 was initially learning C++ as my strengths are in PowerShell. So apologies for the coding that follows 🙂
/* Creates a VM on Morpheus with a button press.
* Change wireless variables
* Change username/pass for Morpheus
* Created By: Chris Bunge/[email protected] 04/12/2020
*/
#include “ESP8266WiFi.h”
#include “WiFiClientSecure.h”
//WiFi Variables
const char* ssid = “WiFiSSID”; //SSID Name
const char* password = “WiFiPW”; //SSID Password
//Morpheus Variables
const int httpsPort = 443;
const char* host = “www.MorpheusURL.com”;
const char* morpheusAuth = “/oauth/token?grant_type=password&scope=write&client_id=morph-customer”;
const char* morpheusInstance = “/api/instances”;
#define morpheusUser “MorpheusUser”
#define morpheusPW “MorpheusPW”
//#define DEBUG true
//Input Variables
#define BLUE 4
#define GREEN 5
#define RED 16
const int buttonPin = 15;
int buttonState = 0;
//Define Color Vars
int redValue;
int greenValue;
int blueValue;
//Functions
//Submit Payload
String postRequest(const char* server, String head, String data) {
#ifdef DEBUG
Serial.print(“Function: “); Serial.println(“postRequest()”);
#endif
String result = “”;
// Use WiFiClientSecure class to create TLS connection
WiFiClientSecure client;
client.setInsecure();
Serial.print(“Connecting To: “); Serial.println(server);
if (!client.connect(server, httpsPort)) {
Serial.println(“Connection Failed”);
return result;
}
if(client.verifyCertChain(server)) {
#ifdef DEBUG
Serial.print(“Post: “); Serial.println(head + data);
#endif
client.print(head + data);
#ifdef DEBUG
Serial.println(“Request Sent”);
Serial.println(“Receiving Response:”);
#endif
while (client.connected()) {
if(client.find(“HTTP/1.1 “)) {
String status_code = client.readStringUntil(‘\r’);
Serial.print(“Status code: “); Serial.println(status_code);
if(status_code != “200 “) {
Serial.println(“An Error Has Occurred!”);
client.stop();
return result;
}
}
if(client.find(“access_token\”:\””)) {
Serial.println(“Successfully Grabbed Bearer Token…”);
String access_token = client.readStringUntil(‘\”‘);
result += access_token;
#ifdef DEBUG
Serial.print(“Access Token: “); Serial.println(access_token);
#endif
}
}
return result;
}
}
void setup()
{
//Pin Setup
pinMode(RED, OUTPUT);
pinMode(GREEN, OUTPUT);
pinMode(BLUE, OUTPUT);
digitalWrite(RED, HIGH);
digitalWrite(GREEN, LOW);
digitalWrite(BLUE, LOW);
pinMode(buttonPin, INPUT);
redValue = 255; // choose a value between 1 and 255 to change the color.
greenValue = 0;
blueValue = 0;
Serial.begin(9600);
// Connect to WiFi
WiFi.begin(ssid, password);
// while wifi not connected yet, print ‘.’
// then after it connected, get out of the loop
while (WiFi.status() != WL_CONNECTED) {
delay(500);
Serial.print(“.”);
}
// WiFi Connected, LED BLUE
Serial.println(“”);
Serial.println(String(“Successfully connected: “) + ssid);
redValue = 0;
blueValue = 255;
analogWrite(RED, redValue);
analogWrite(BLUE, blueValue);
//Print IP
Serial.println(“”);
Serial.println(WiFi.localIP());
}
void loop() {
buttonState = digitalRead(buttonPin);
if (buttonState == HIGH) {
WiFiClientSecure client;
client.setInsecure();
//Button Press
Serial.println(“”);
Serial.println(“VM Build Starting”);
greenValue = 255;
blueValue = 0;
analogWrite(GREEN, greenValue);
analogWrite(BLUE, blueValue);
//Step 1: OAUTH Request
//Create Body
String authData = “”;
authData += F(“username=”);
authData += morpheusUser;
authData += F(“&password=”);
authData += morpheusPW;
//Create Header
String authHeader = “”;
authHeader += (String(“POST “) + morpheusAuth + ” HTTP/1.1\r\n”);
authHeader += (String(“Host: “) + host + “\r\n”);
authHeader += (F(“Connection: close\r\n”));
authHeader += (F(“Accept: */*\r\n”));
authHeader += (F(“Content-Type: application/x-www-form-urlencoded\r\n”));
authHeader += (“Content-Length: “);
authHeader += (authData.length());
authHeader += (“\r\n\r\n”);
//Submit OAUTH Payload
String token = postRequest(host, authHeader, authData);
//Step 2: VM Build Request
//Create Body
String postData = “”;
postData += “{\r\n\”zoneId\”:138,\r\n\”instance\”:{\r\n\”name\”:\”EasyButton-${sequence}\”,\r\n\”cloud\”:\”VMware Demo Cluster\”,\r\n\”site\”:{\r\n\”id\”:2\r\n},\r\n\”type\”:\”apache\”,\r\n\”instanceType\”:{\r\n\”code\”:\”apache\”\r\n},\r\n\”description\”:\”BuiltwithEasyButtonAPI!\”,\r\n\”instanceContext\”:\”demo\”,\r\n\”layout\”:{\r\n\”id\”:69\r\n},\r\n\”plan\”:{\r\n\”id\”:145,\r\n\”code\”:\”vm-512\”,\r\n\”name\”:\”1CPU, 512MB Memory\”\r\n},\r\n\”networkDomain\”:{\r\n\”id\”:null\r\n}\r\n},\r\n\”config\”:{\r\n\”resourcePoolId\”:370,\r\n\”noAgent\”:\”off\”,\r\n\”smbiosAssetTag\”:null,\r\n\”nestedVirtualization\”:\”off\”,\r\n\”hostId\”:\”\”,\r\n\”vmwareFolderId\”:\”group-v64130\”,\r\n\”vmwareCustomSpec\”:null,\r\n\”createUser\”:true\r\n},\r\n\”plan\”:{\r\n\”id\”:145,\r\n\”code\”:\”vm-512\”,\r\n\”name\”:\”1CPU, 512MB Memory\”\r\n},\r\n\”volumes\”:[\r\n{\r\n\”id\”:-1,\r\n\”rootVolume\”:true,\r\n\”name\”:\”root\”,\r\n\”size\”:10,\r\n\”sizeId\”:null,\r\n\”storageType\”:1,\r\n\”datastoreId\”:\”auto\”,\r\n\”hasDatastore\”:true\r\n}\r\n],\r\n\”networkInterfaces\”:[\r\n{\r\n\”network\”:{\r\n\”id\”:\”networkGroup-2\”\r\n},\r\n\”networkInterfaceTypeId\”:4\r\n}\r\n]\r\n}”;
//Create Header
String postHeader = “”;
postHeader += (String(“POST “) + morpheusInstance + ” HTTP/1.1\r\n”);
postHeader += (String(“Host: “) + host + “\r\n”);
postHeader += (F(“Connection: close\r\n”));
postHeader += (F(“Accept: */*\r\n”));
postHeader += (F(“Authorization: Bearer “));
postHeader += (token);
postHeader += (“\r\n”);
postHeader += (F(“Content-Type: application/json\r\n”));
postHeader += (“Content-Length: “);
postHeader += (postData.length());
postHeader += (“\r\n\r\n”);
//Submit VM Payload
Serial.println(“Submitting VM Building JSON”);
postRequest(host, postHeader, postData);
//Cleanup
client.stop();
Serial.println(“”);
Serial.println(“Build Request Process Complete!”);
greenValue = 0;
blueValue = 255;
analogWrite(GREEN, greenValue);
analogWrite(BLUE, blueValue);
}
}
[ /sourcecode]
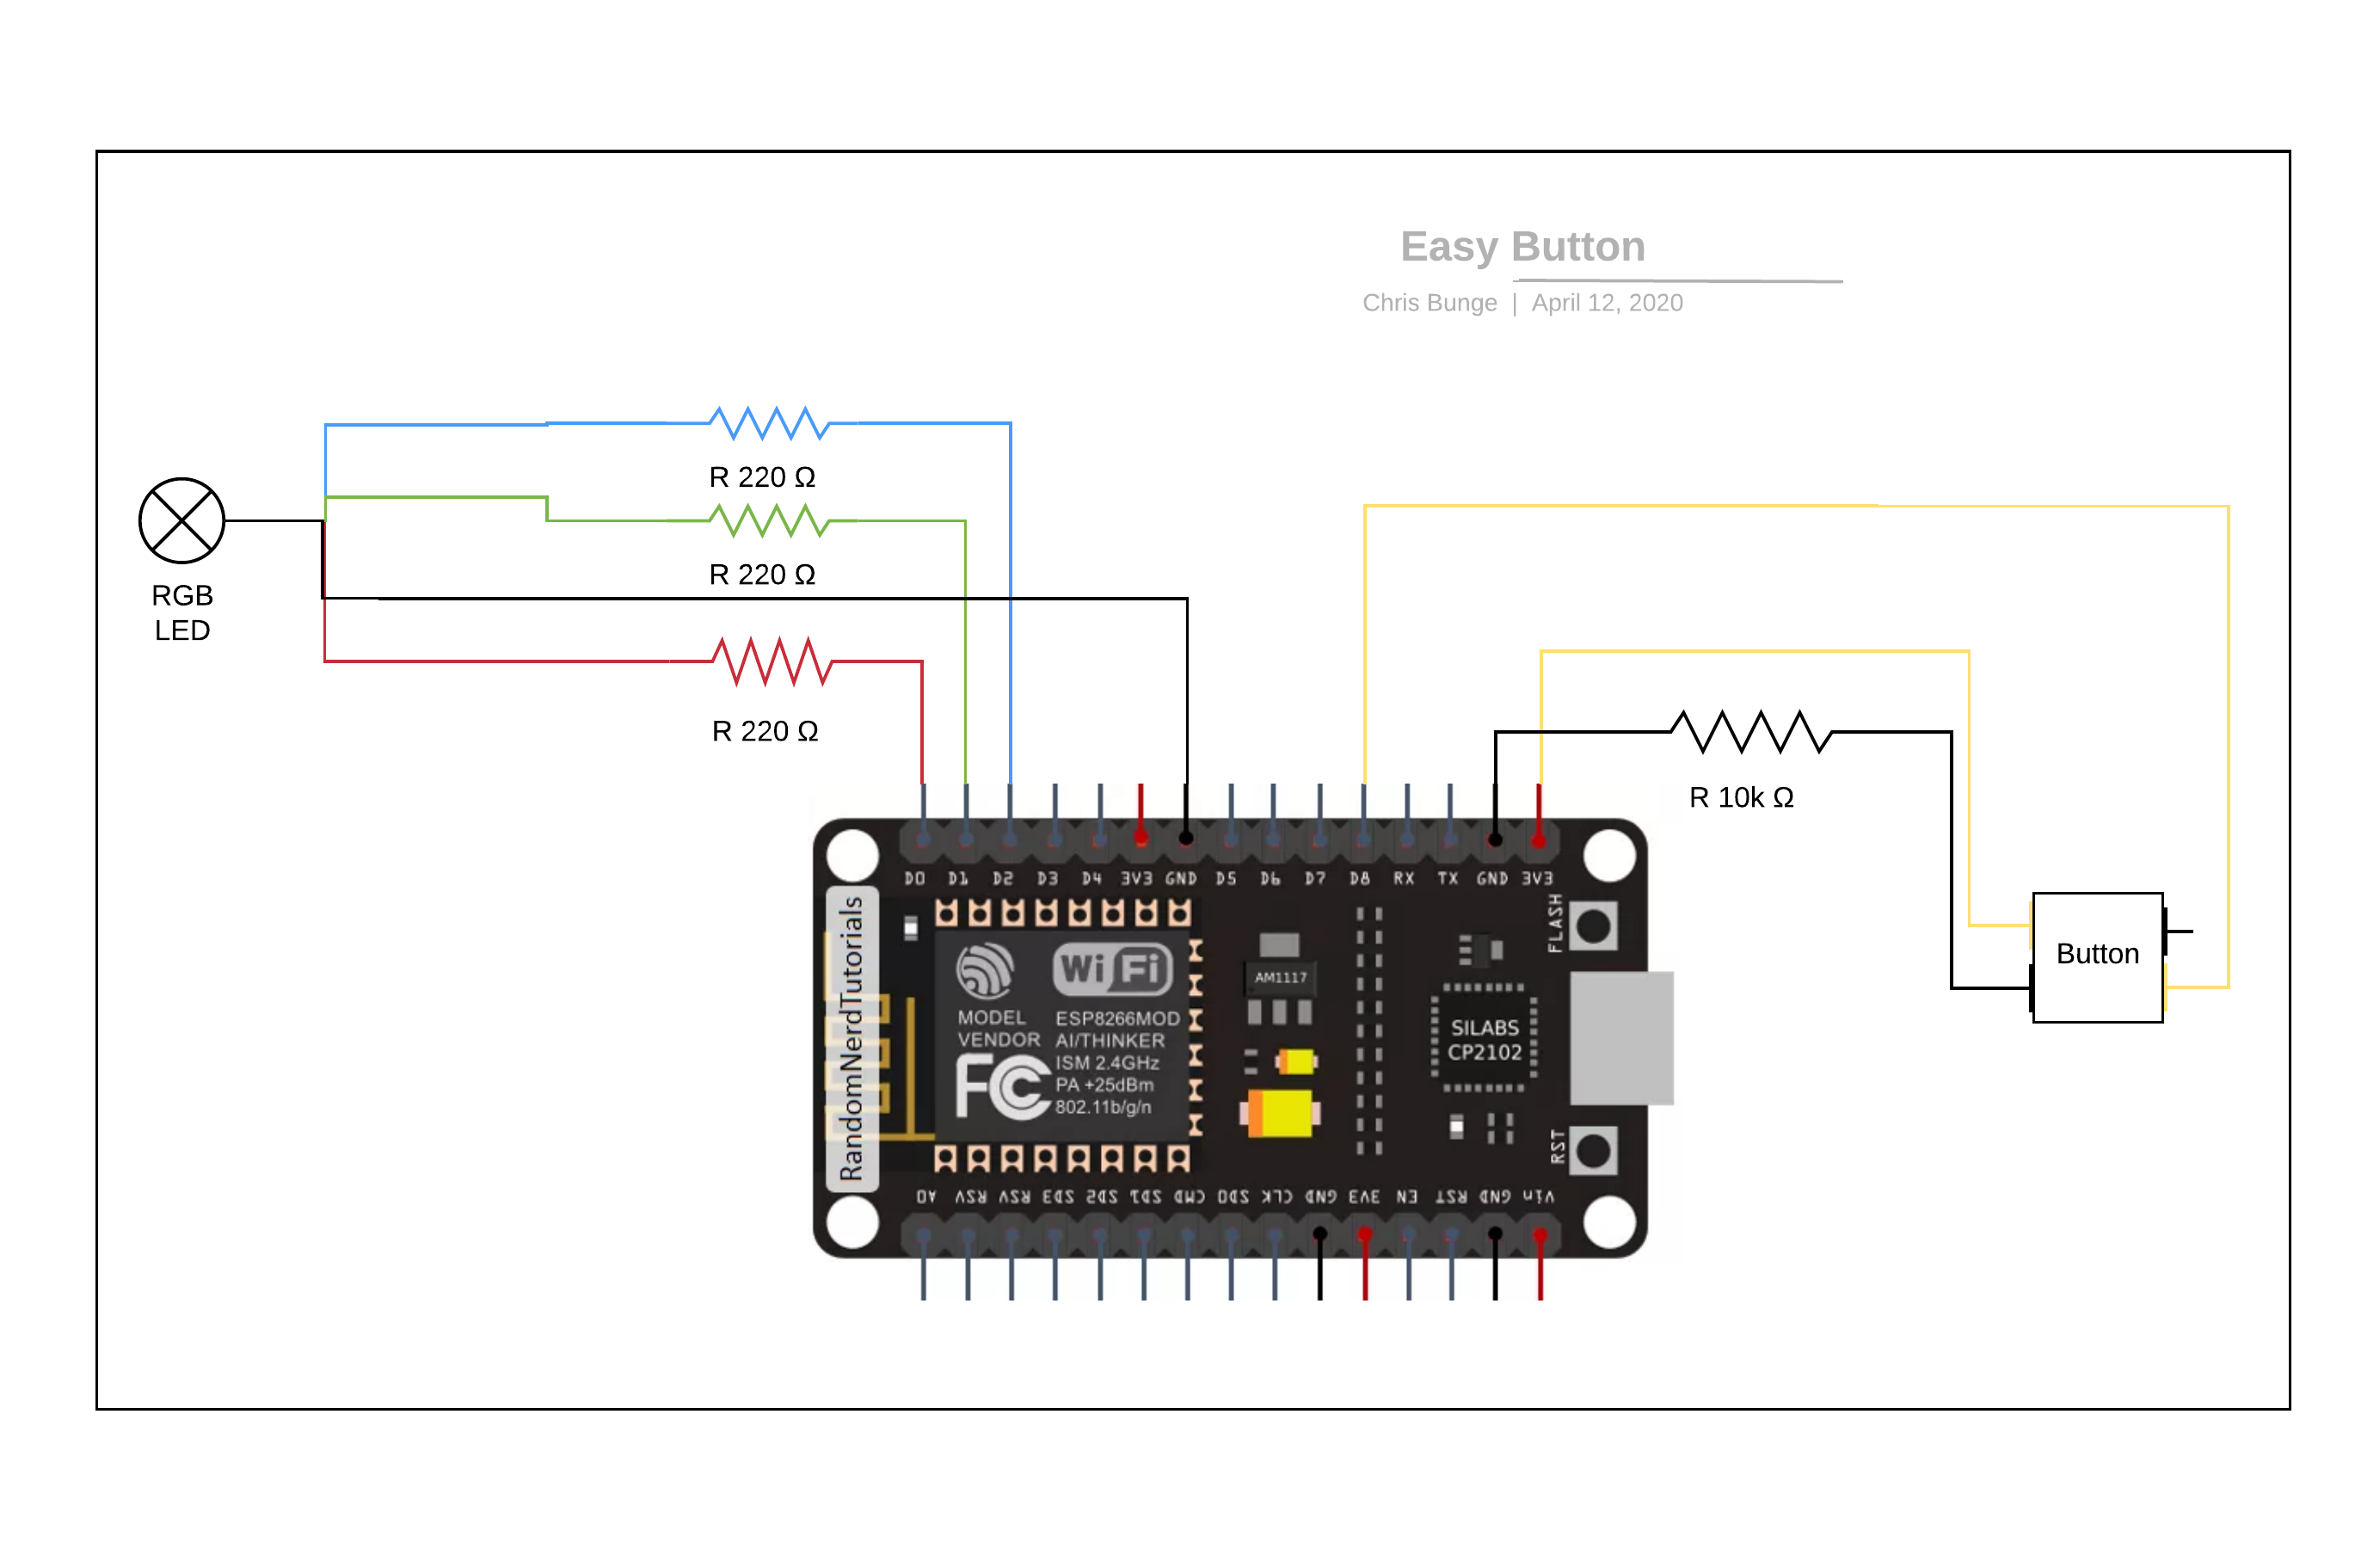
configuration
Inside of the configuration I have all of my constants/vars used throughout the process. These include the WiFi user creds, Morpheus user creds, and pin defaults for the RGB light.
The code here also handles username + password for OAuth. I know I could’ve just passed a pre-generated bearer token, but those expire and take maintenance. This was a far friendlier approach for any user to consume the code. In order to use OAuth to generate the bearer, this will at least consume 1 API call. Once I have the token, I can then make an additional request for the VM to be built. This is where the ‘Submit Payload’ function comes to play.
The ‘Submit Payload’ function will handle inputs for OAuth, as well as submit any payload I need against my endpoint [Morpheus]. It’s not the cleanest, but I wanted a simple code to get up and online. All I have to do is pass server, head, and data to the function and it’ll step through the call process. This part was actually a struggle getting the correct body/returns via HTTPS. I tried to follow several guides around this, but none of them suited my needs.
void setup()
Note: The setup function only runs once. These items are to establish the initial configuration of the device on power up.
My initial hurdle was figuring out the portability. The main purpose of this device was taking it to any presentation or job site for demo purposes. Figuring I could tap into my phone tethering from pretty much anywhere, I found code to establish WiFi connectivity for the ESP 8266. This part of the project was very simple as there are several modules that exist to connect an Arduino to WiFi.
Additionally since I would not have a terminal present, I needed status codes for the device. I decided to connect a RGB LED to handle the responses, rather than attempt any small panel or blink codes for the built-in LED. On initial power, this presents a RED light. Once connected successfully to the WiFi, the status light then turns BLUE.
void loop()
Note: The loop function continuously executes in a loop, monitoring for a status/input.
This section is really the monitor of the button state. It’s a continuous loop looking for the button to be pressed. First we establish the initial button state, then it’s a large if statement for if the button is pressed. Once we press the button, the code changes the RGB to GREEN to signify the submission is occurring. It then walks through the body payload creations and pushes it to the previously described ‘Submit Payload’ function. After the job is done, the light is returned back to BLUE for ready state.
Build
Wiring Schematic 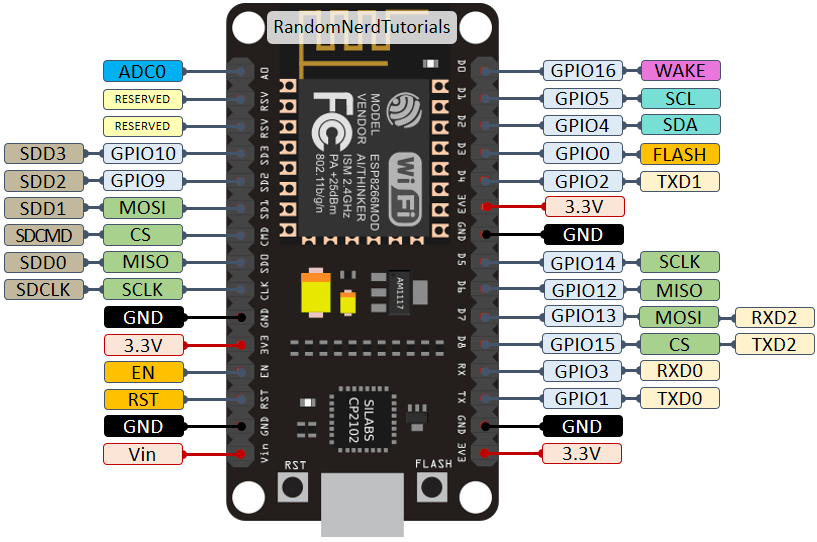
Pin Layout 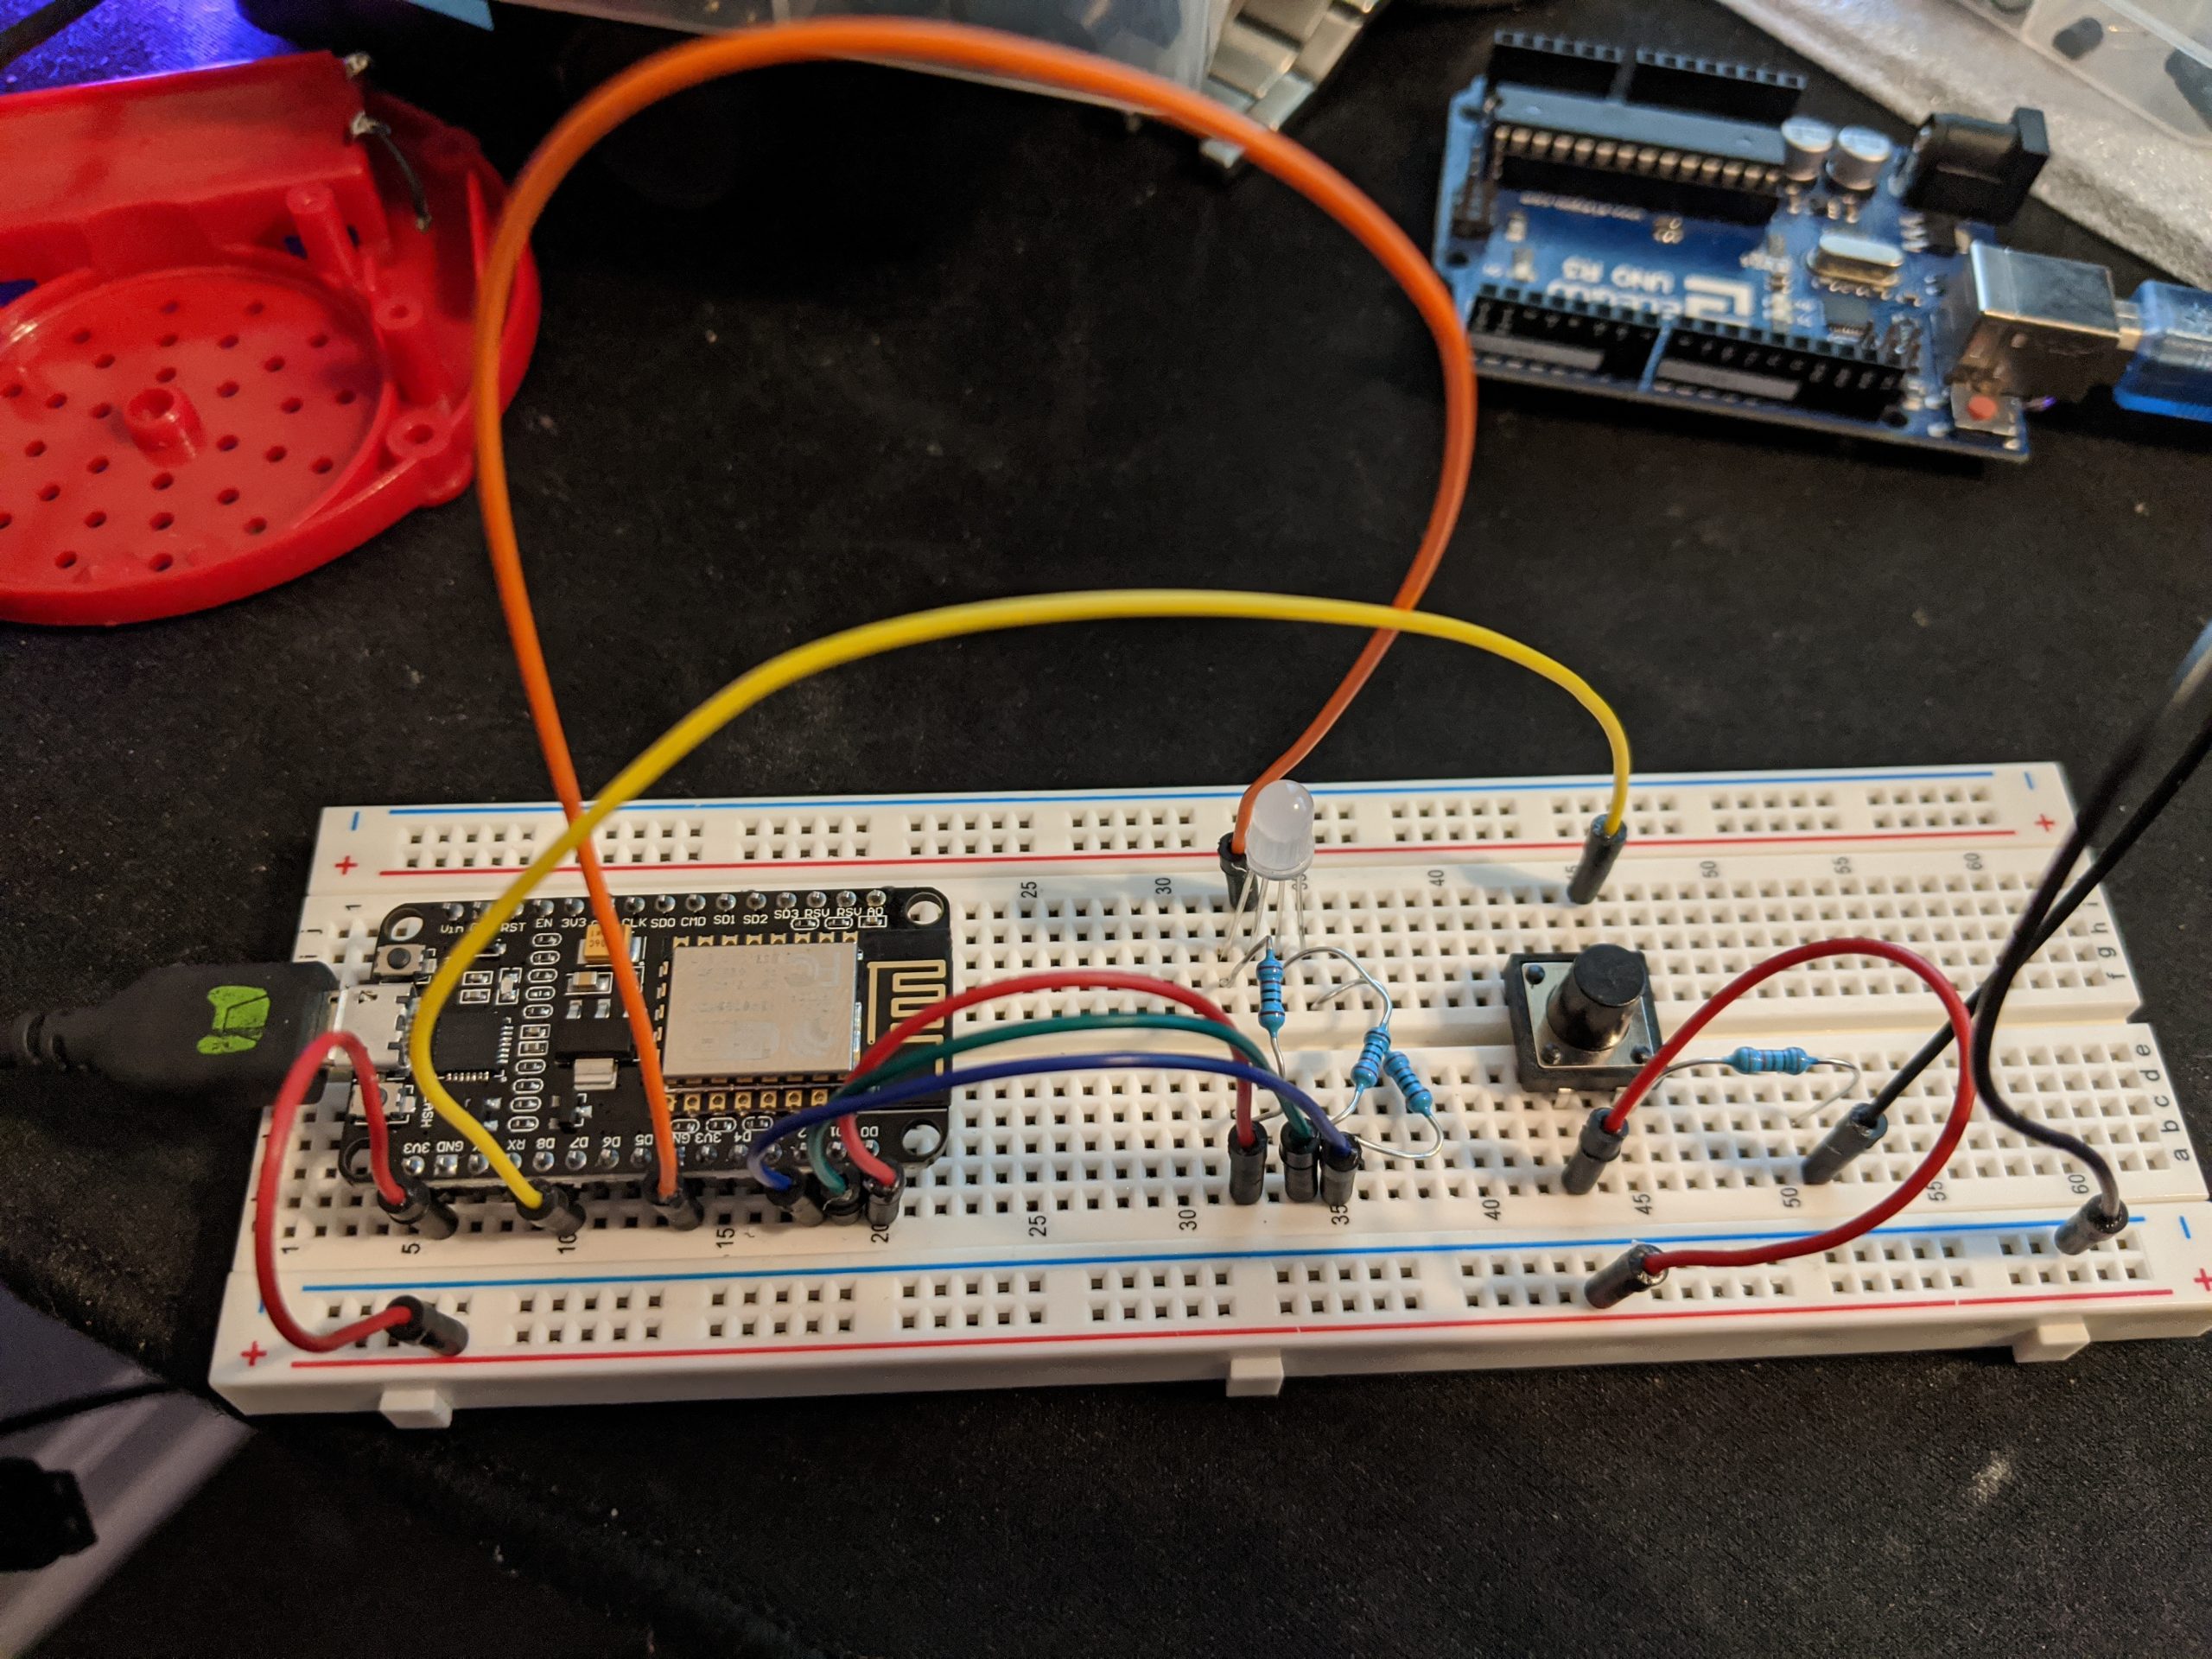
Testing 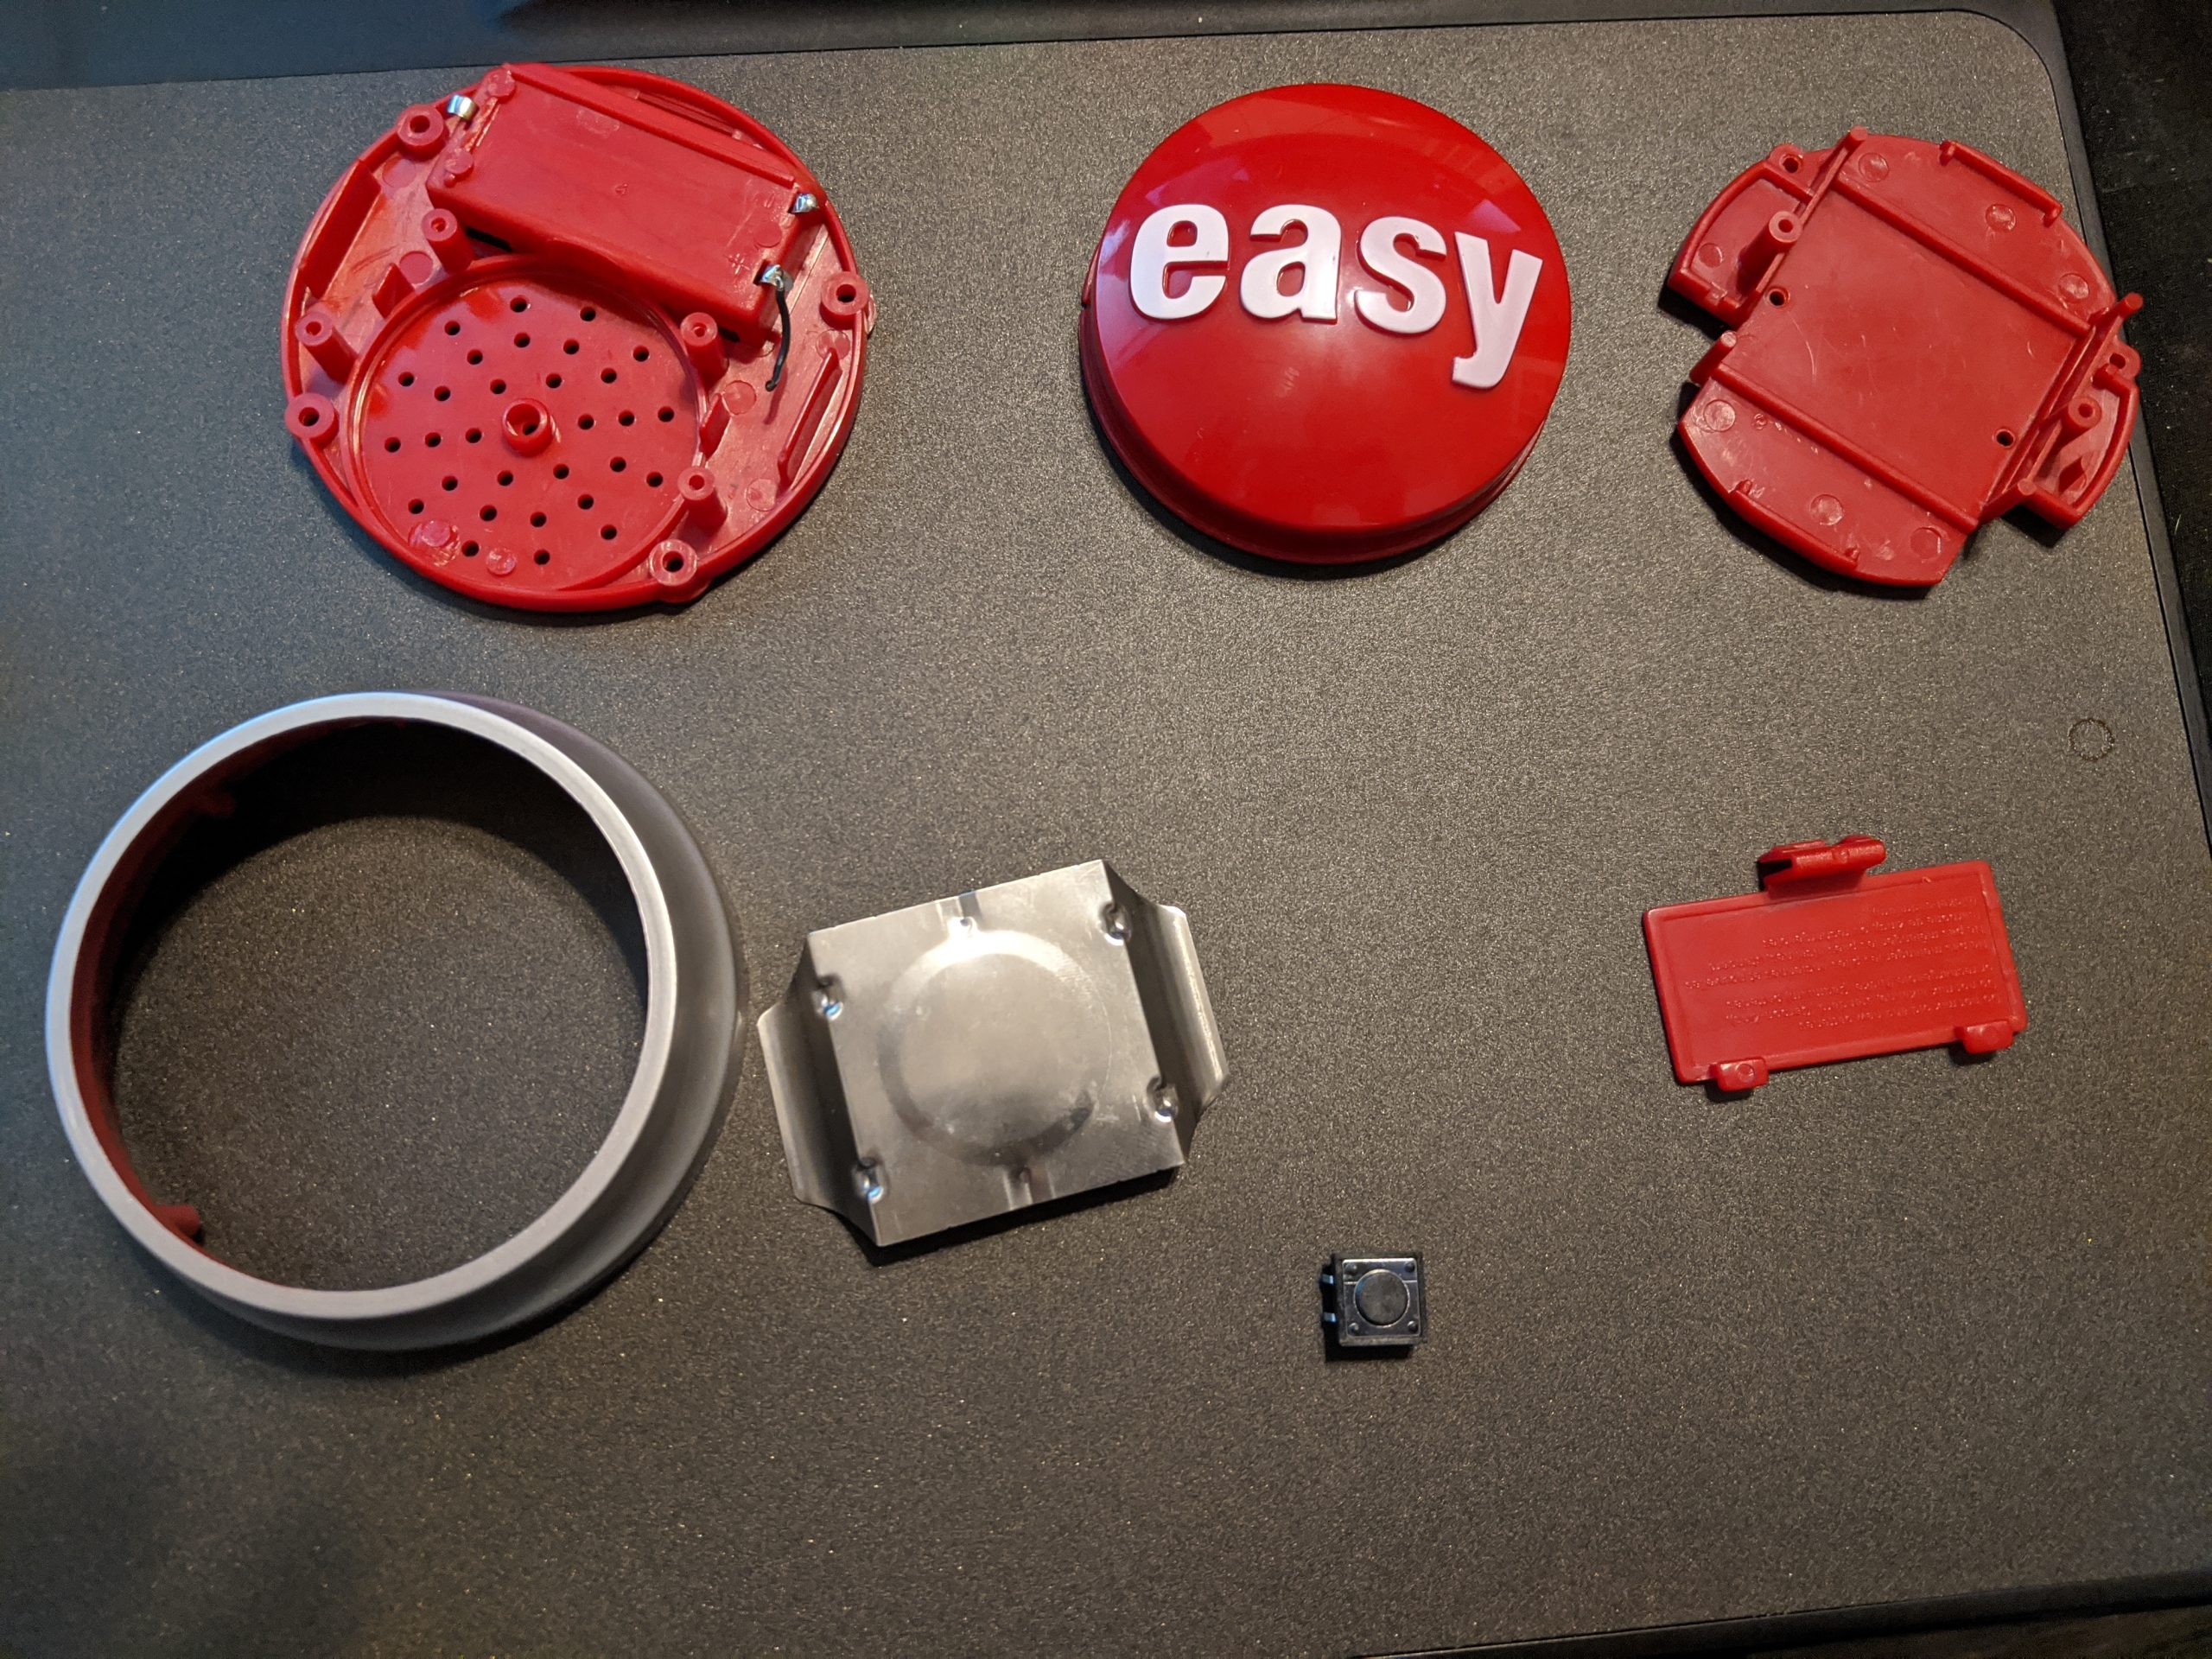
Staples Dismantled 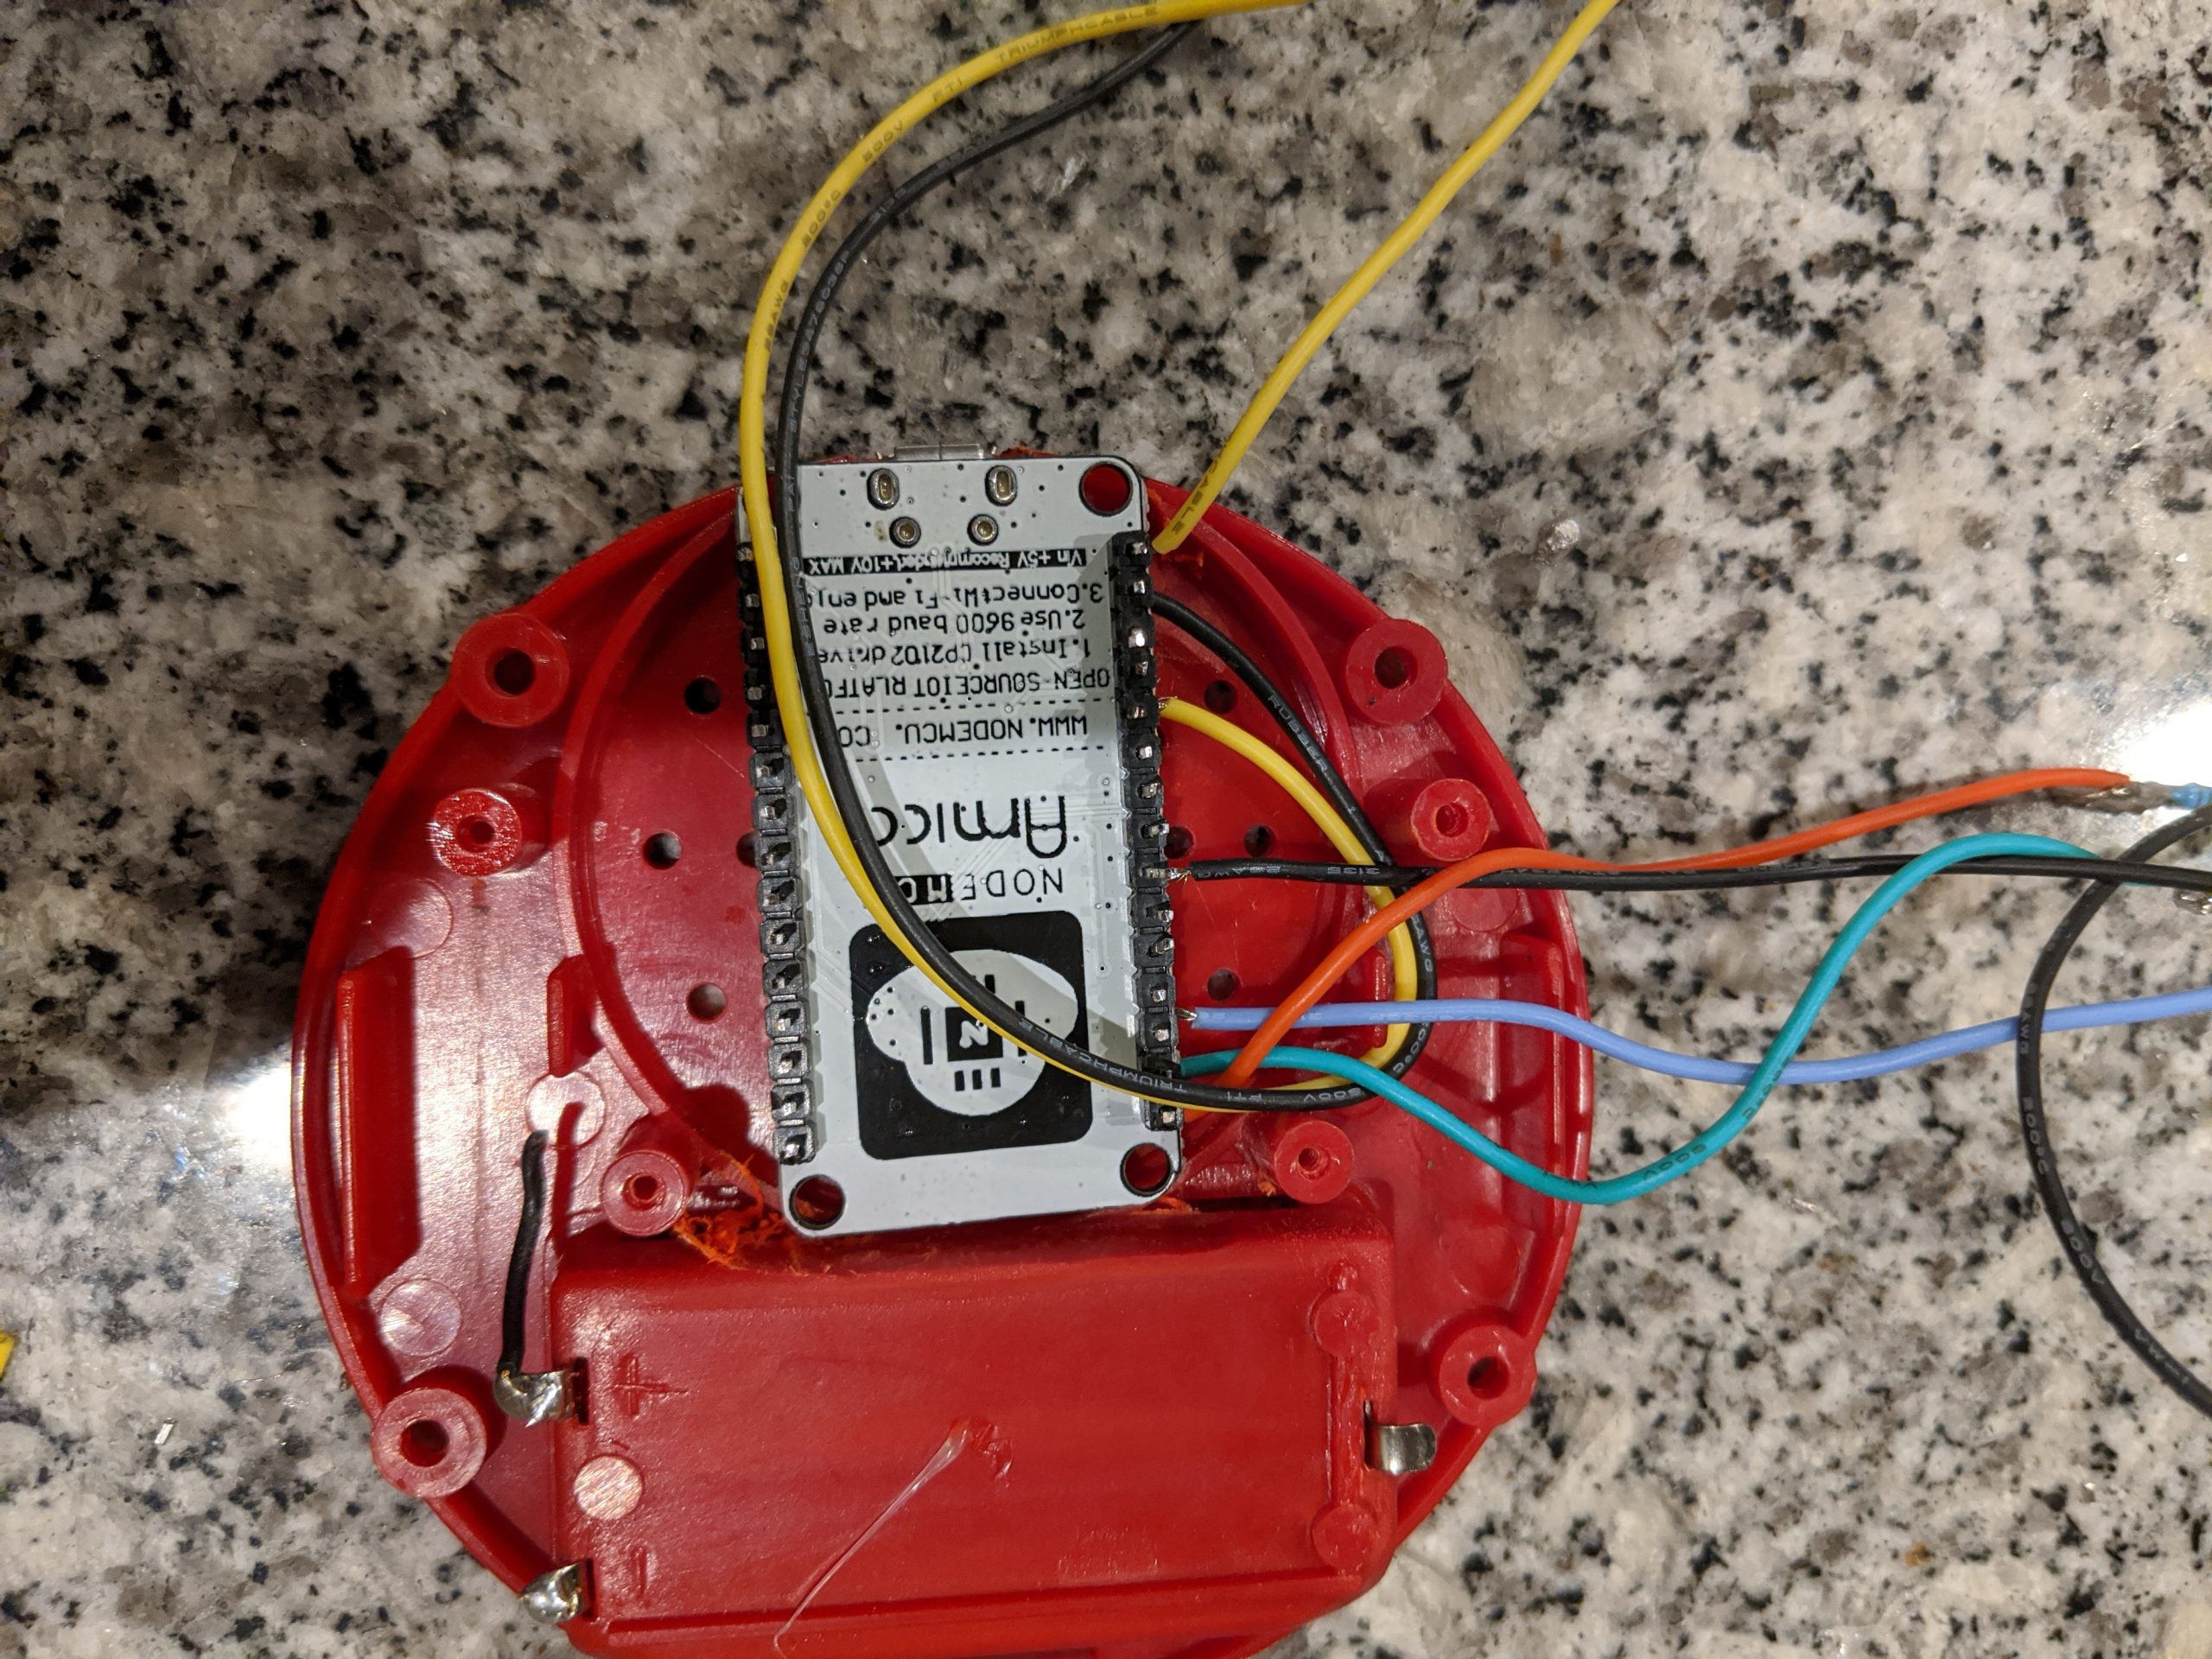
Board Placement 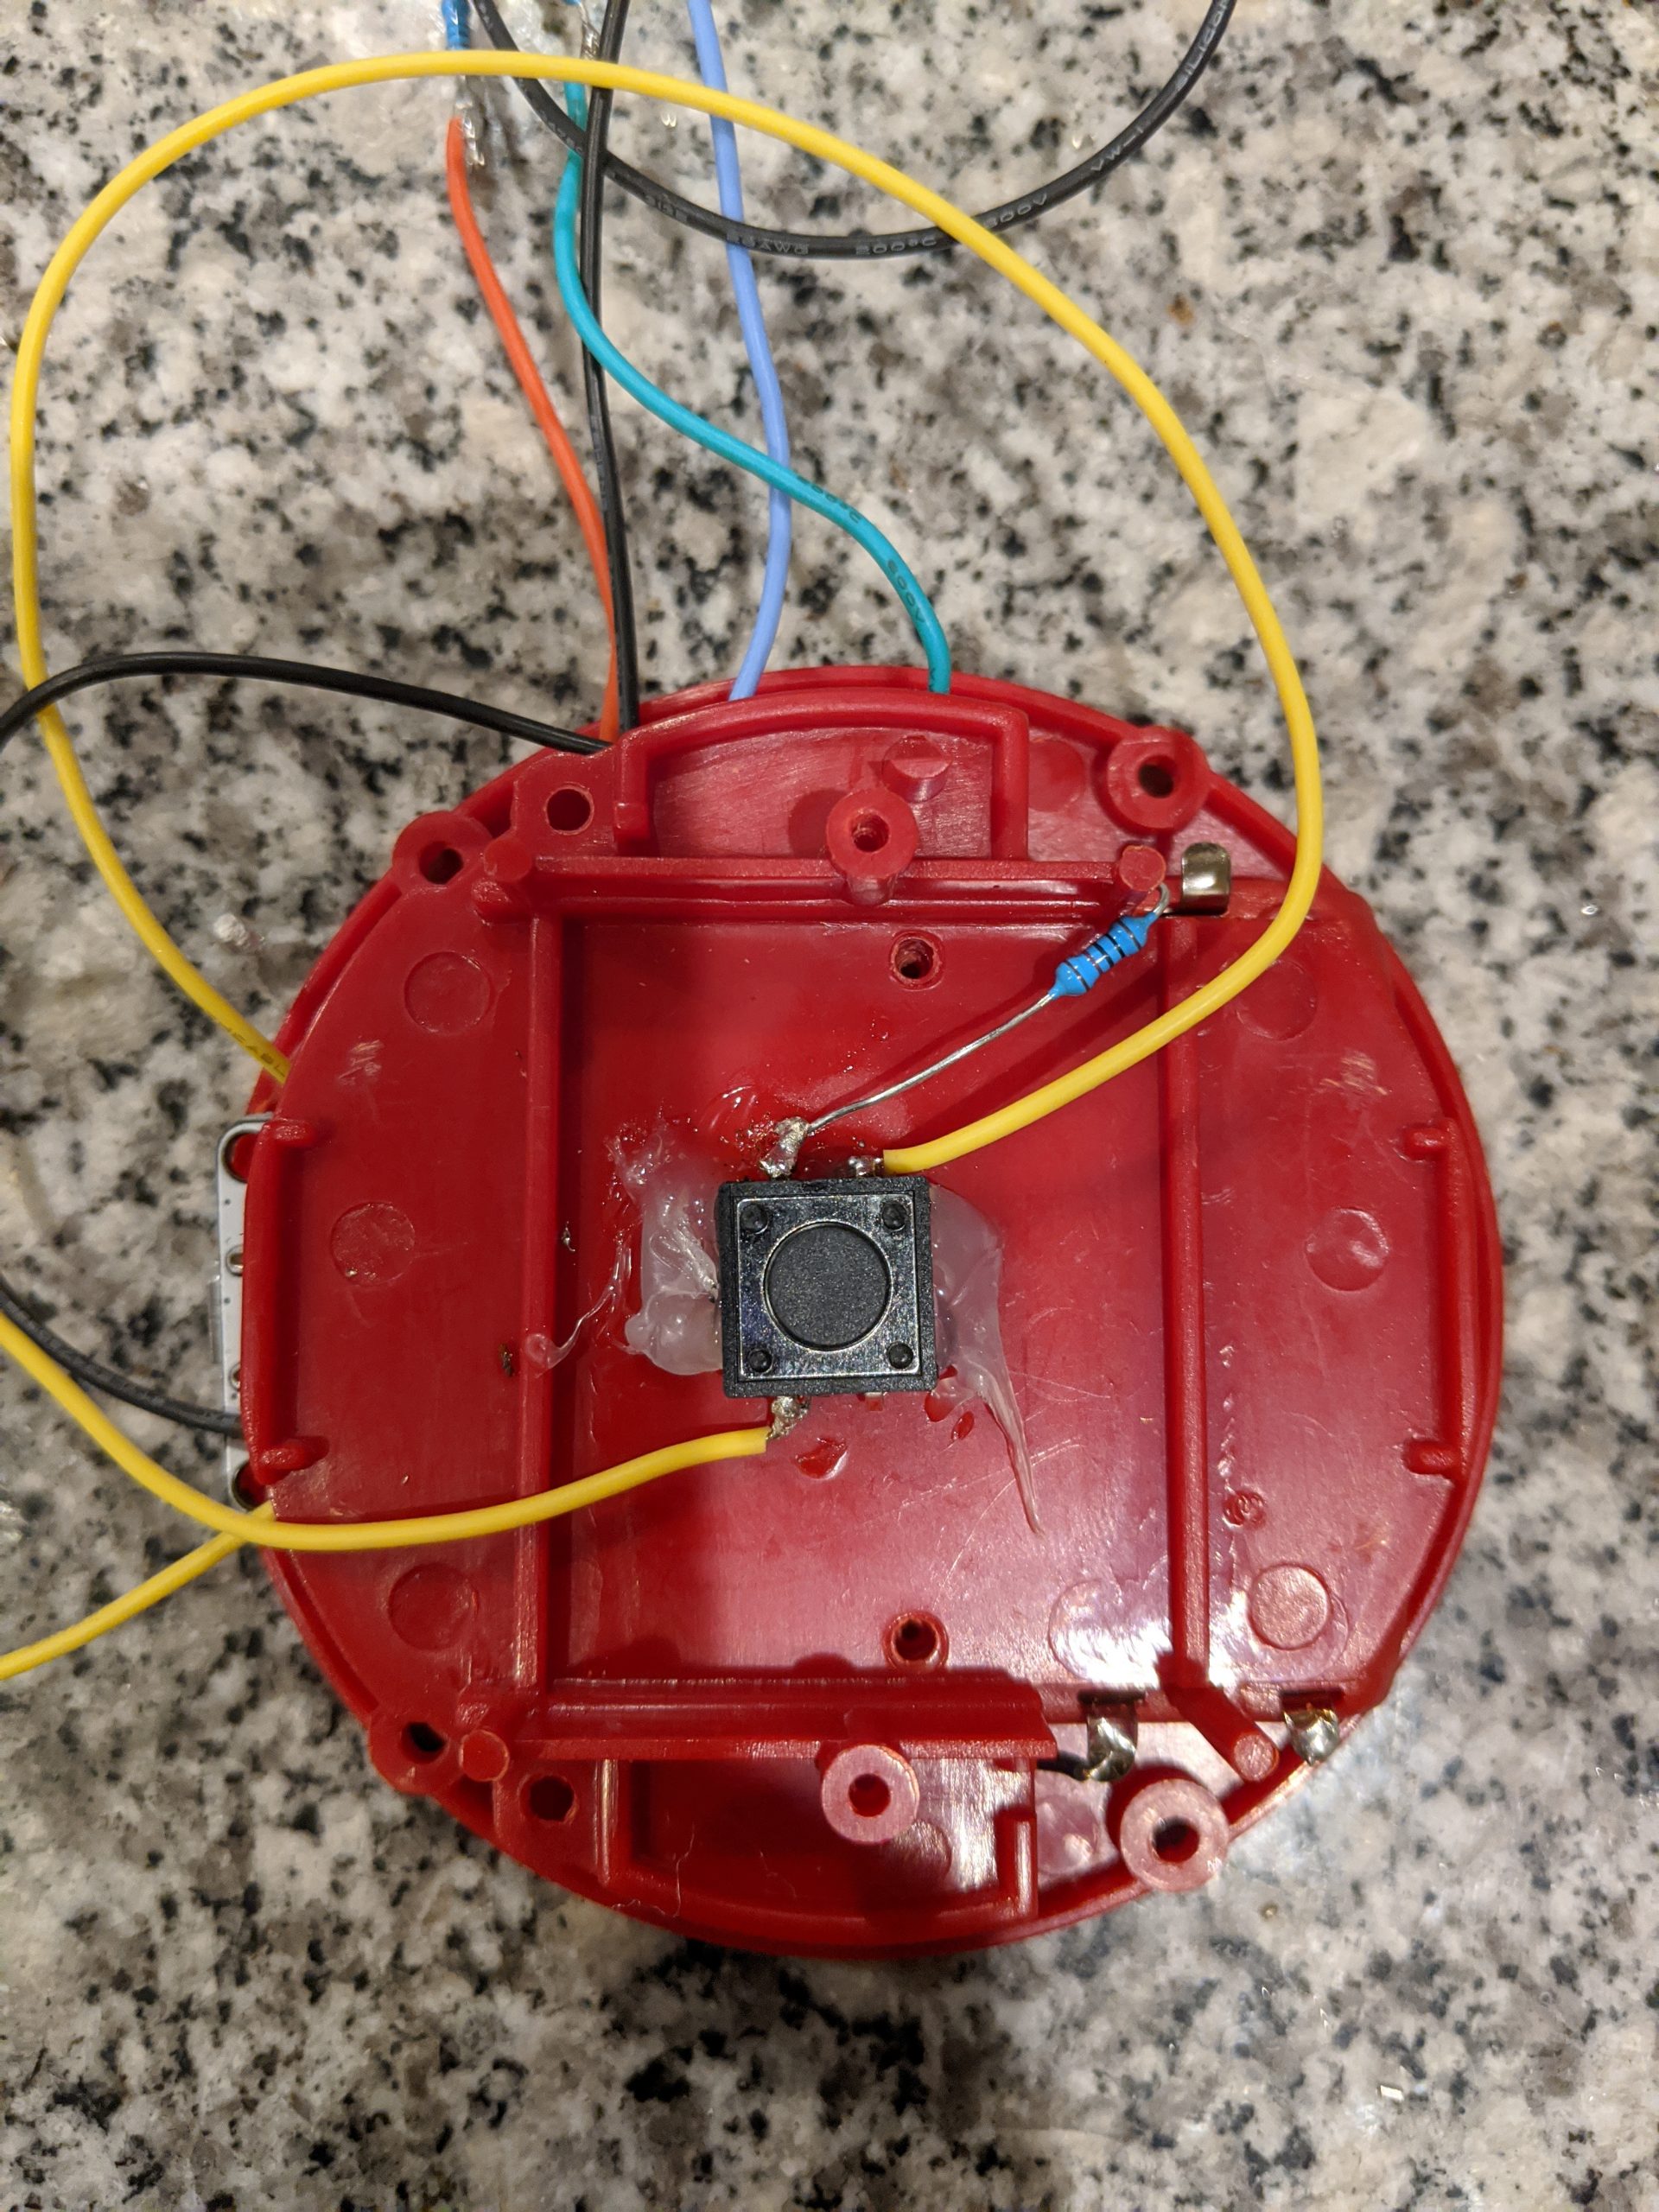
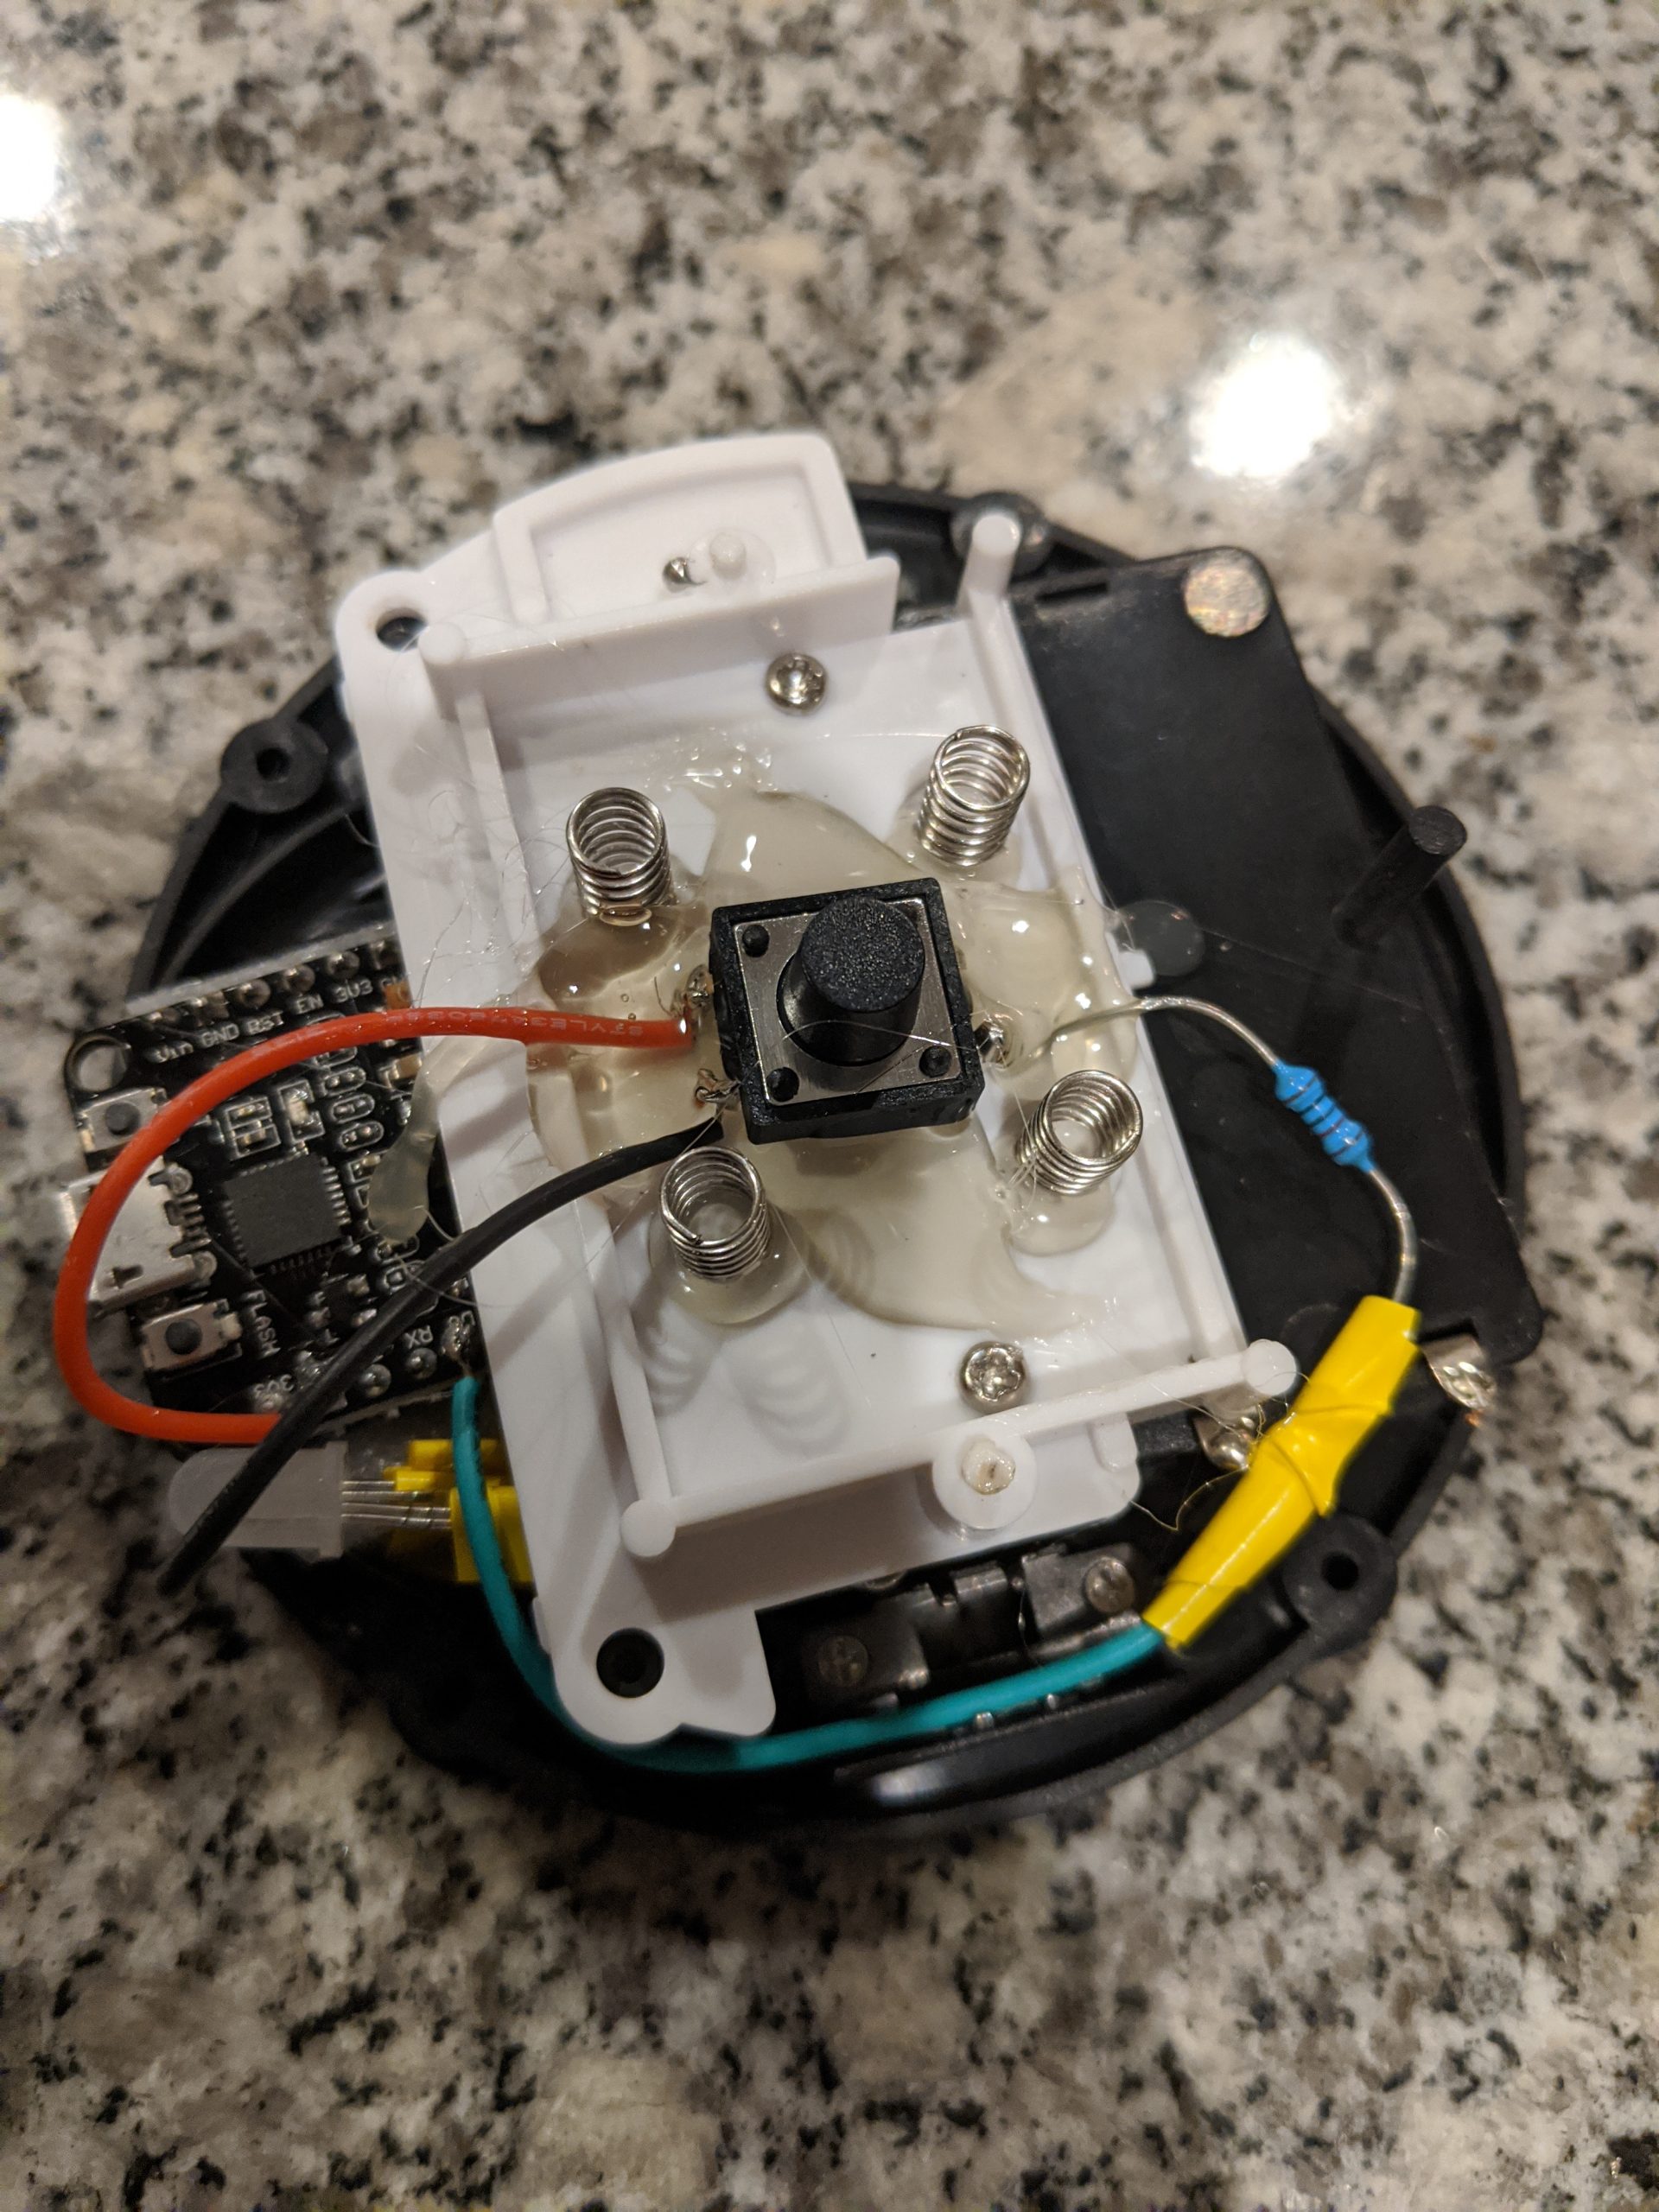
Configuring the Button 
Everything Wired 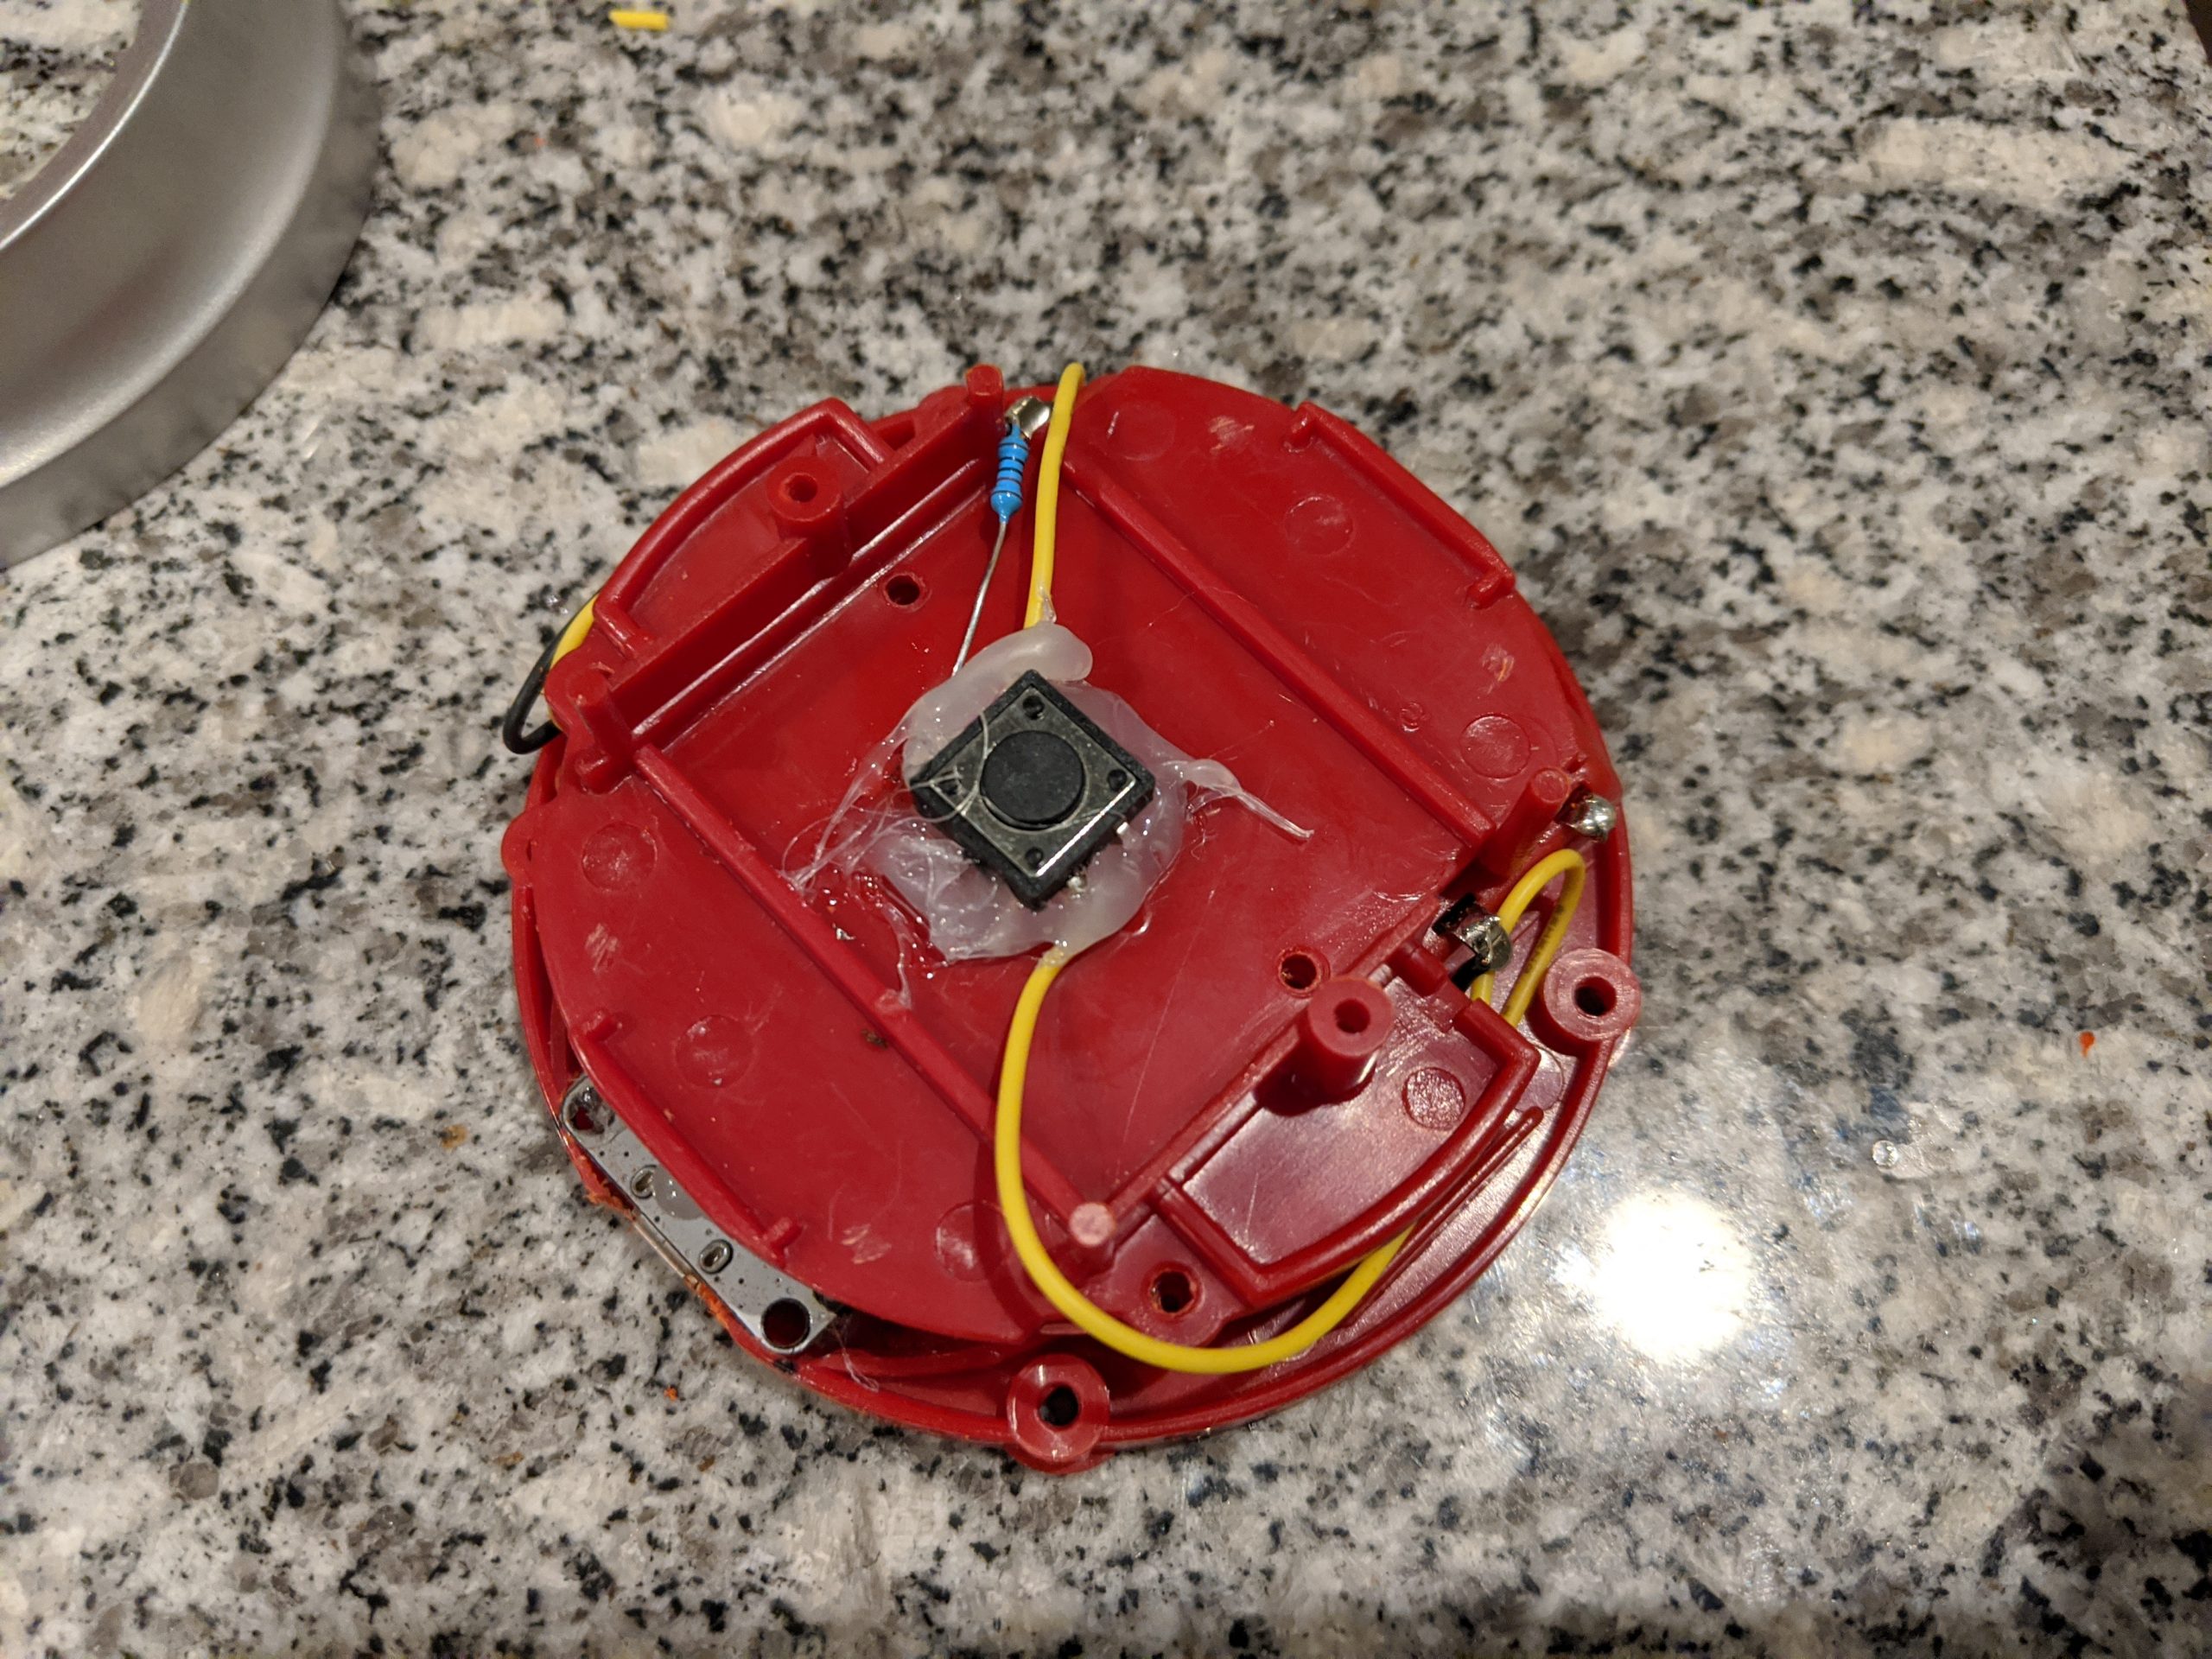
Piecing it Together 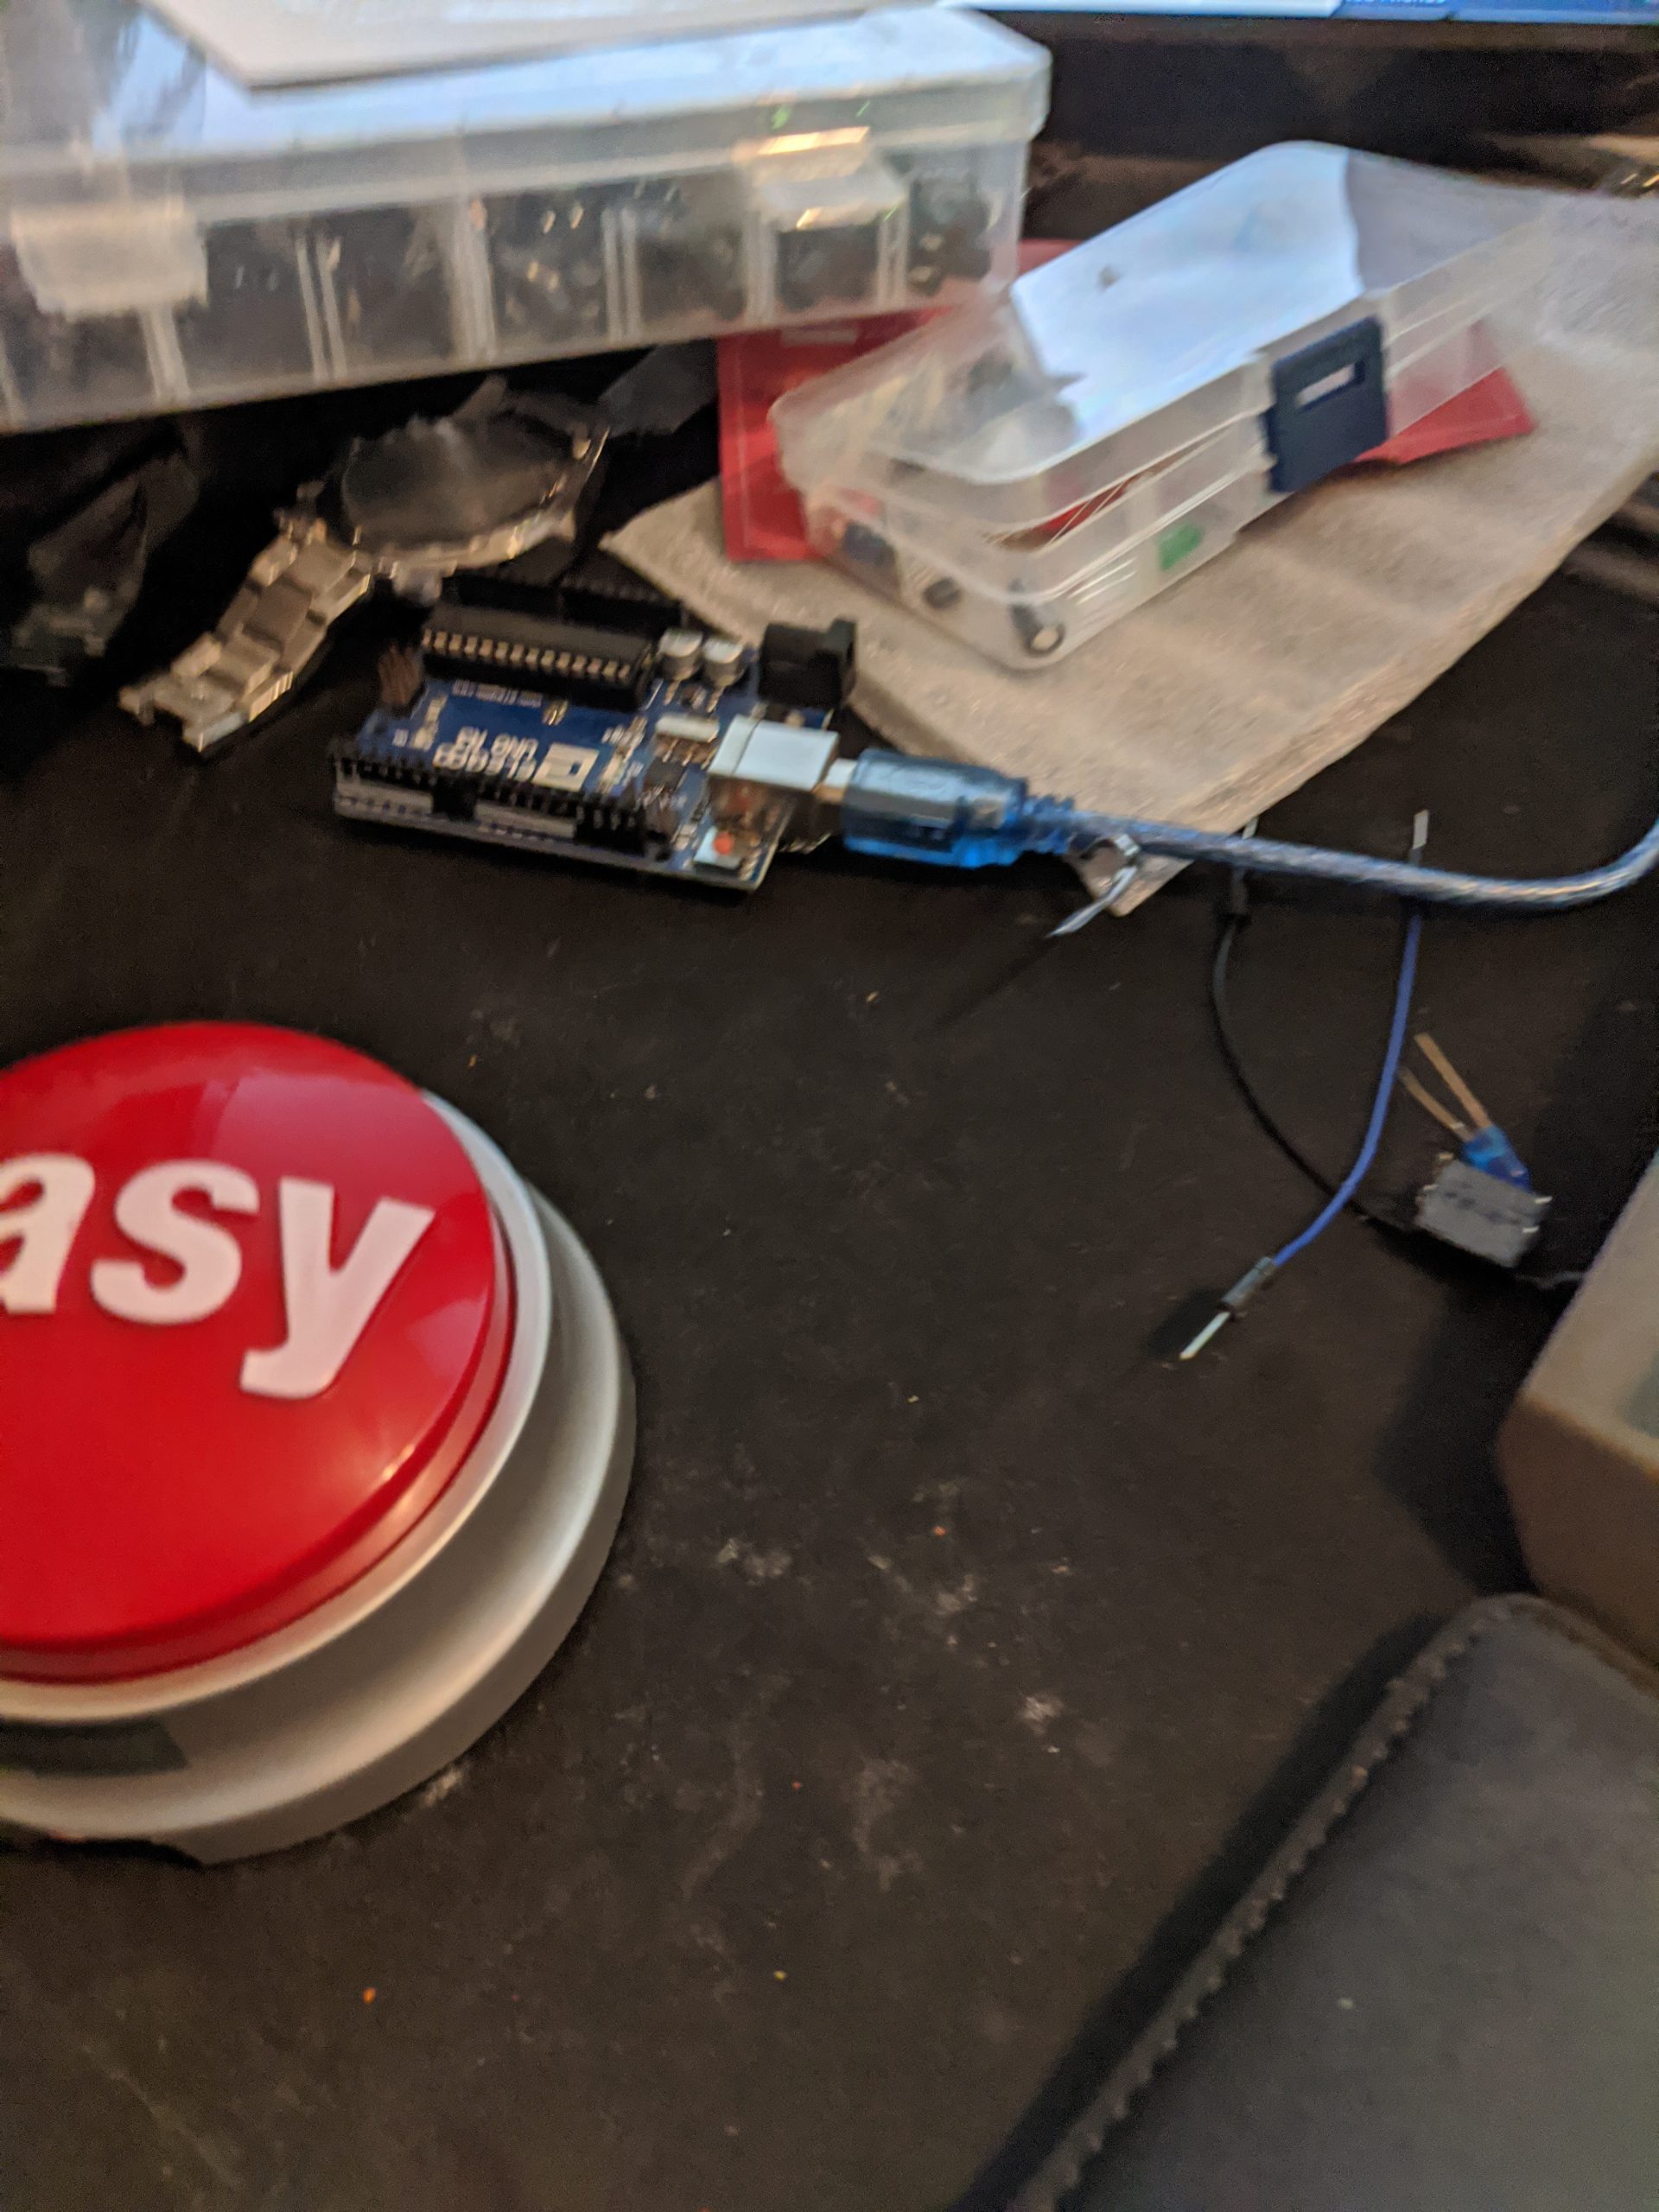
Wired a Generic Button as Well 
Generic Stock Cover 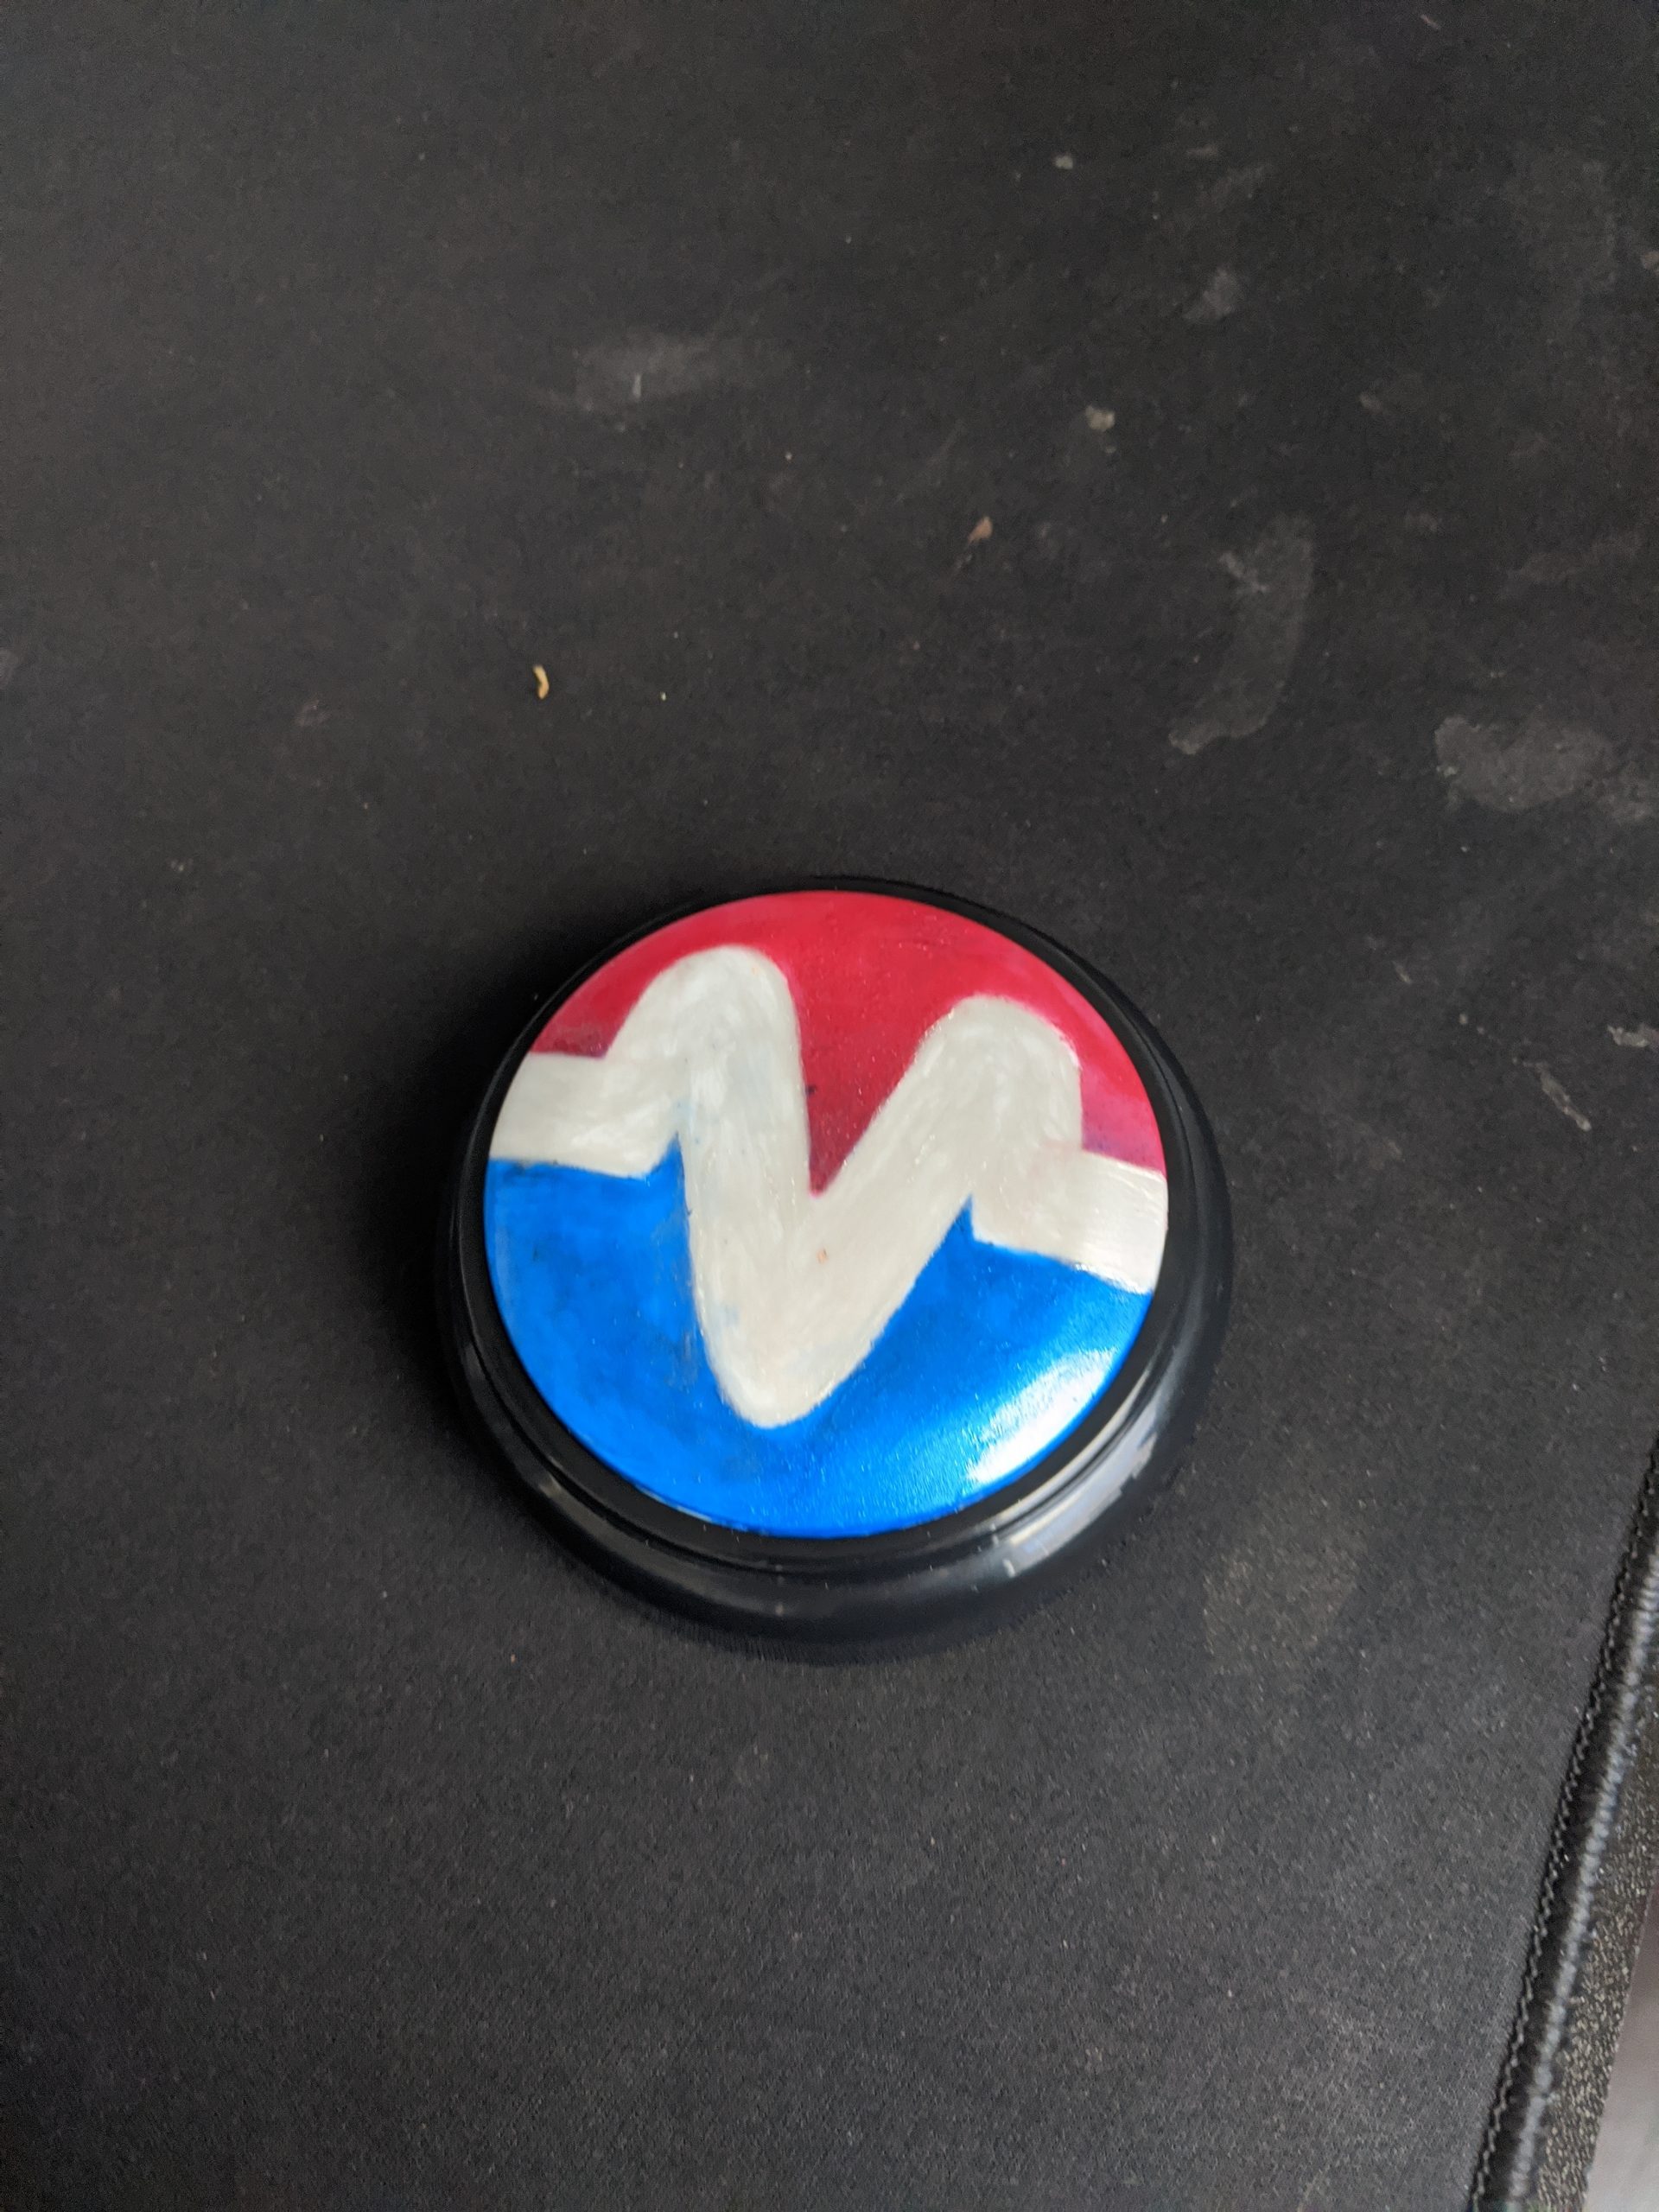
Painted Morpheus Button!
Testing
Now it’s time to test the the button!